In this step, we will do a validation using Google Tag Manager's "Preview & Debug" mode. We will test if the tags are being fired correctly in given conditions - and if they carry out the correct data.
Please be aware that some tutorials are applicable to the latest version. Therefore, you may encounter different tags and event names in the tag manager.
If you're using versions of Analyzify older than V3.2, refer to this guide to update your theme . In case your version is not updated, you may still see the old event names.
To prevent any confusion, here's a table detailing the old and new event names:
|
Previous Event Names |
Updated Event Names |
|---|---|
|
sh_info |
sh_info |
|
ee_productImpression |
ee_view_item_list |
|
ee_productClick |
ee_select_item |
|
ee_productDetail |
ee_view_item |
|
ee_addToCart |
ee_add_to_cart |
|
ee_cartView |
ee_view_cart |
|
ee_remove_from_cart |
ee_remove_from_cart |
|
ee_checkout |
ee_begin_checkout |
|
ee_purchase |
ee_purchase |
|
ee_checkout_contact_information |
ee_add_contact_info |
|
ee_checkout_shipping_method |
ee_add_shipping_info |
|
ee_checkout_payment_method |
ee_add_payment_info |
Let's get to work!
Log in to your Google Tag Manager account (the one you set up Analyzify with). Click “Preview” at the top-right corner, enter your URL, and click connect.
Your store should be opened in the next tab, and you should see a sign that says “Tag Assistant Connected”.
If you have injected our codes into the duplicate theme, please do not forget to check the “ duplicated theme preview link”.
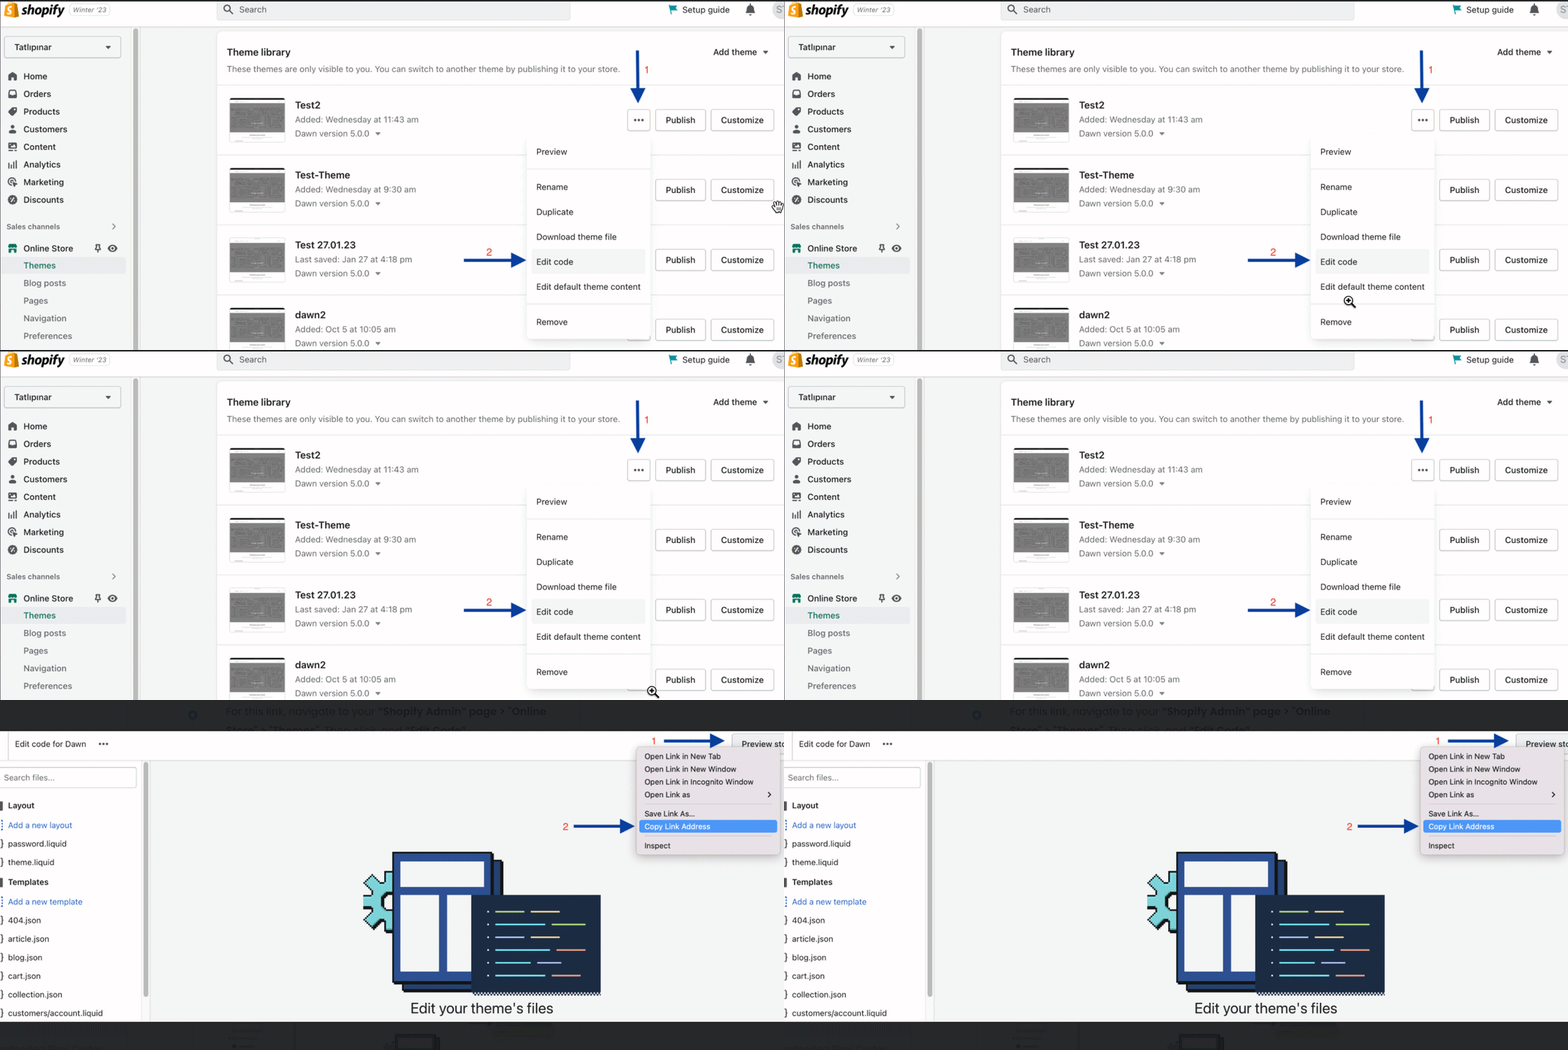
For this link, navigate to your “Shopify Admin” page > "Online Store" > "Themes". Then click, and “Edit Code”.
At this point, hover over the “preview store” button and right-click, then select the “Copy Link Adress”. Use this link in the GTM preview mode.
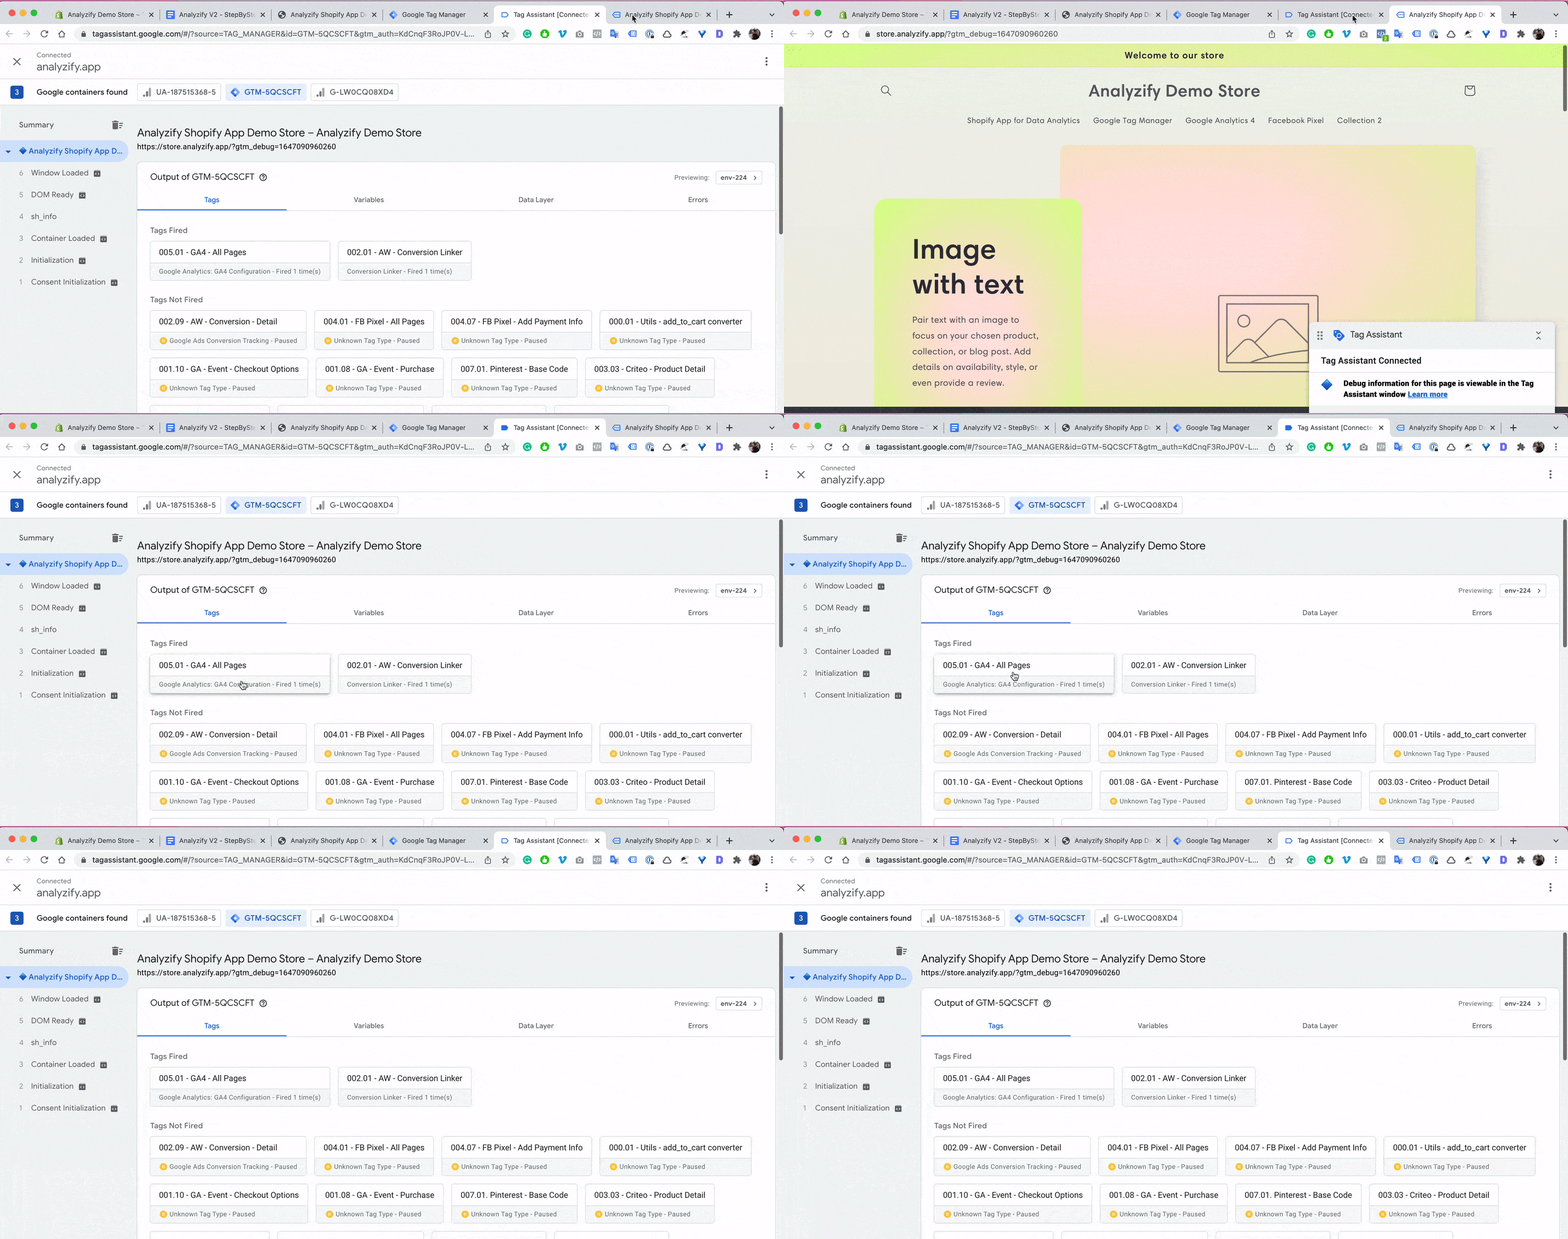
Come back to the Tag Assistant and see if the “GA4 Page View” event is being fired. Depending on your setup, you might see more tags here. However, we will only be double-checking the GA4 events in these steps.
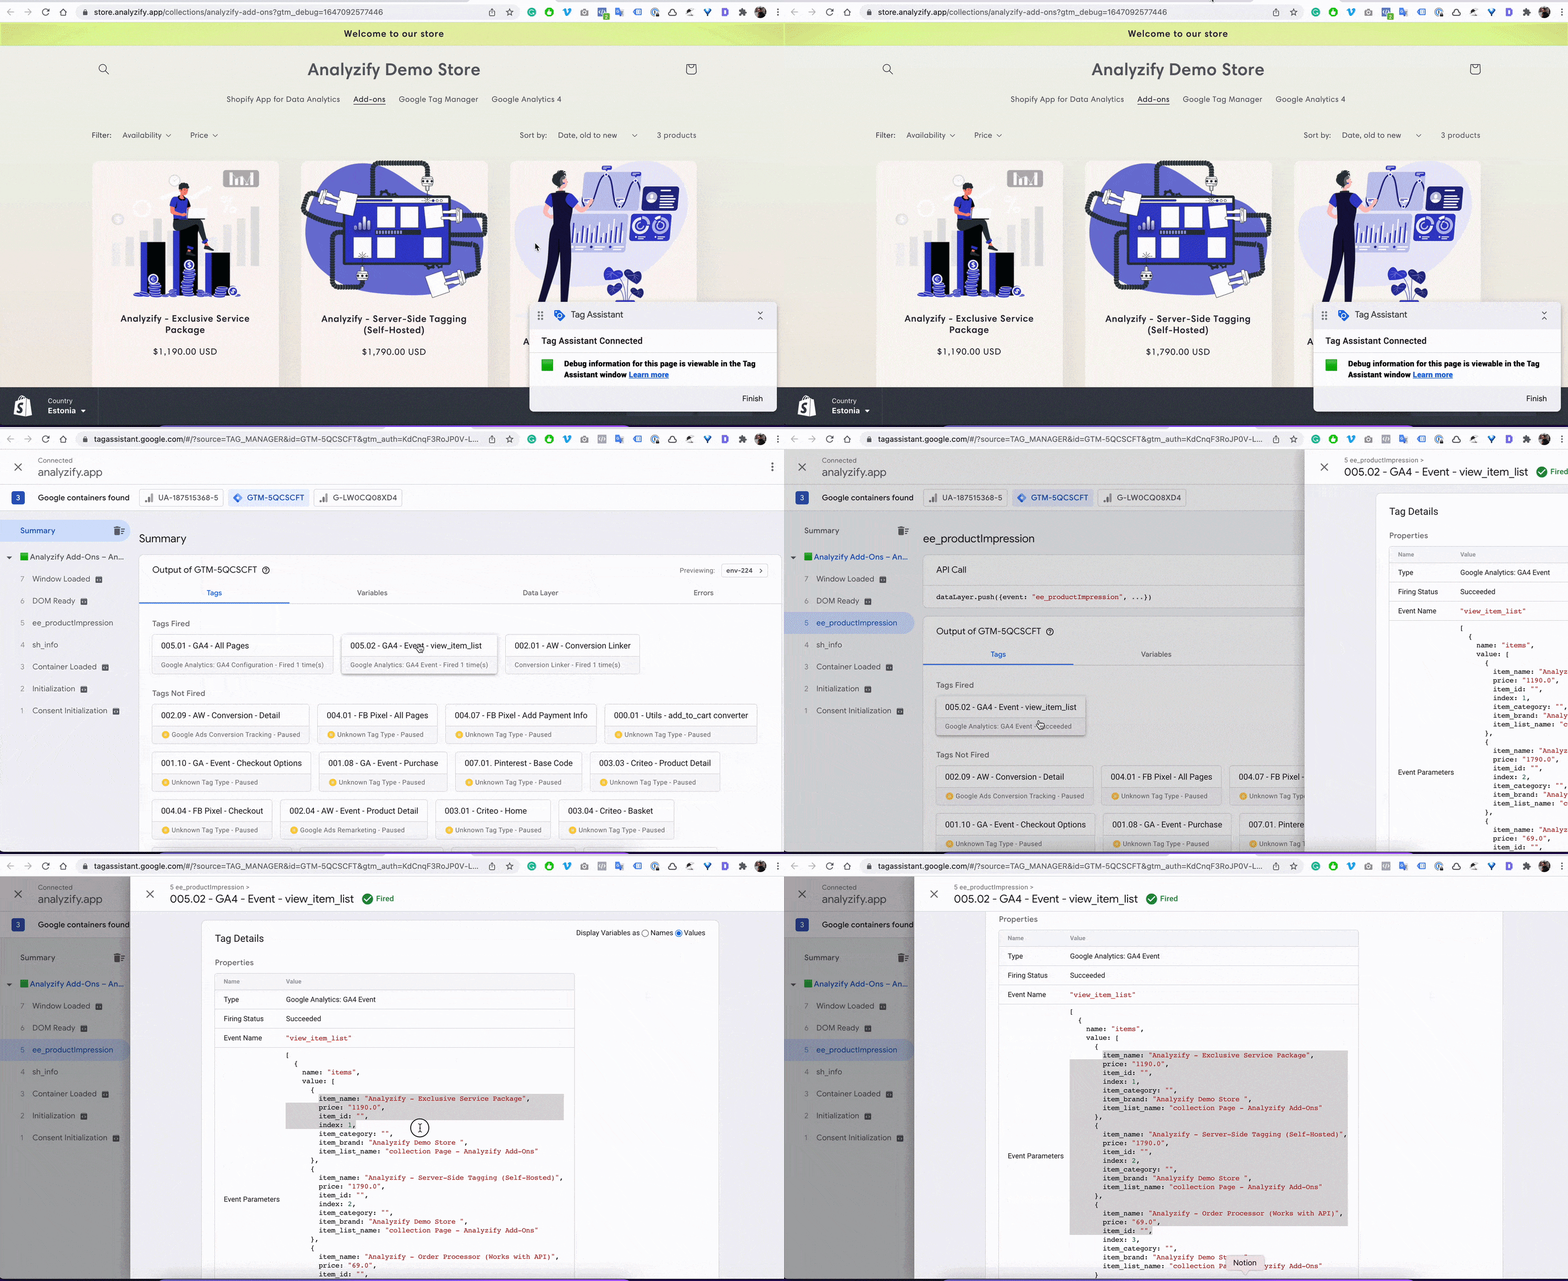
Visit a collection page and go back to the Tag Assistant. You should be seeing the “GA4 - Event - view_item_list” tag, and the “ee_productImpression” event on the left bar.
Firstly, click “ee_productImpression” and then the tag. Make sure to choose “Values” at the top right, and you should be seeing the listed product names and all the related product data there.
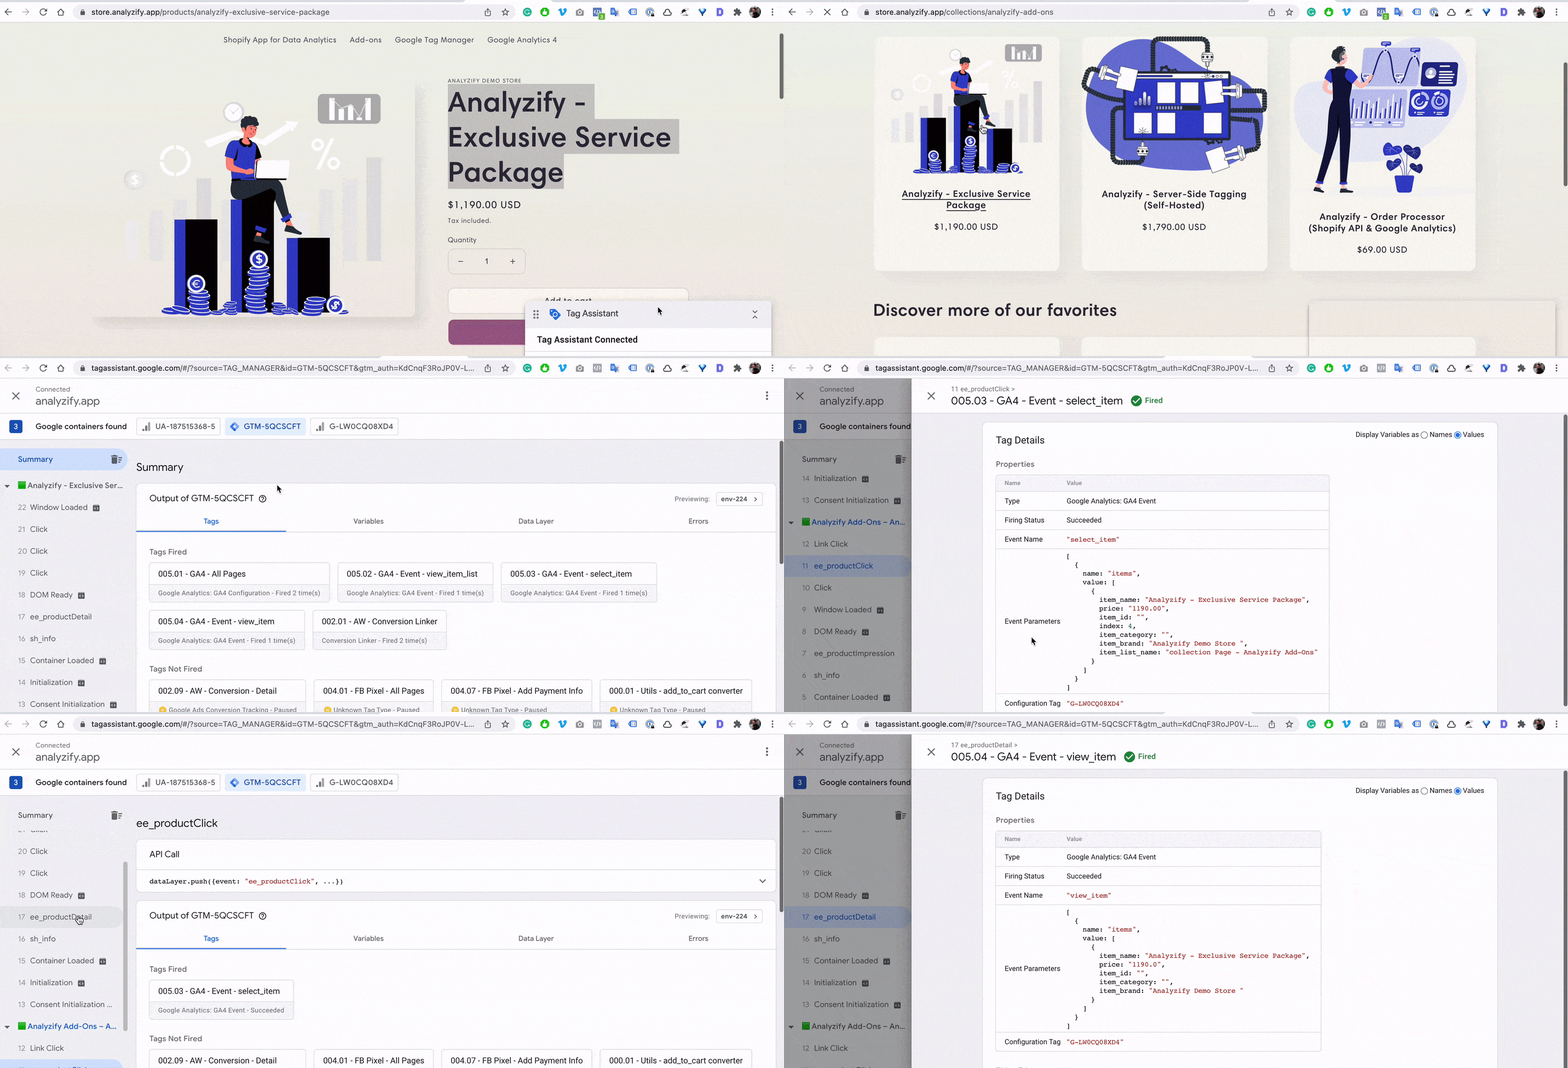
Click a product from the collection page and then view the product.
You should be seeing the related events with the correct sequence: "ee_productClick" > "GA4 - Event - select_item - ee_productDetail" > "GA4 - Event - view_item"
Now, click "Add to Cart" on a product page, and see if the "ee_addToCart" event is being triggered.
If a problem appears here and the event doesn't seem to be triggered, don’t worry. Just contact us.
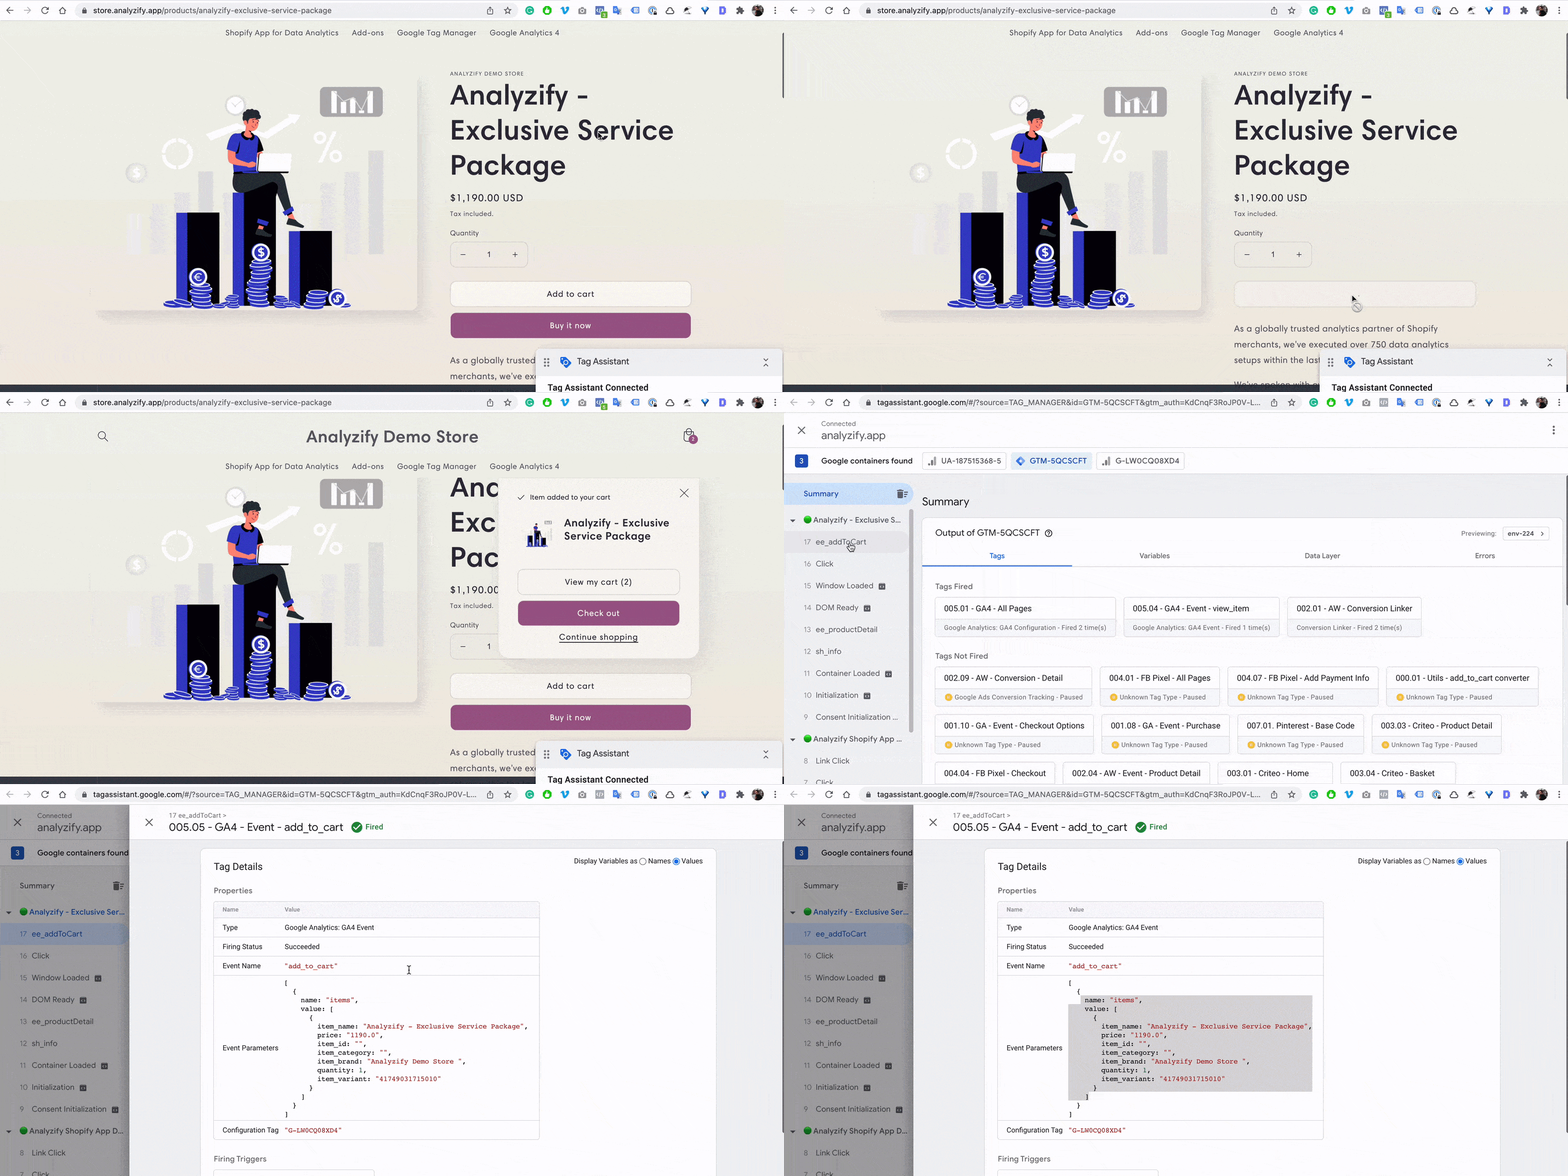
After clicking the “add-to-cart” button, click the “view cart” button. You should be seeing the related events with the correct sequence: "ee_cartView" > ”GA4 - Event - View Cart”
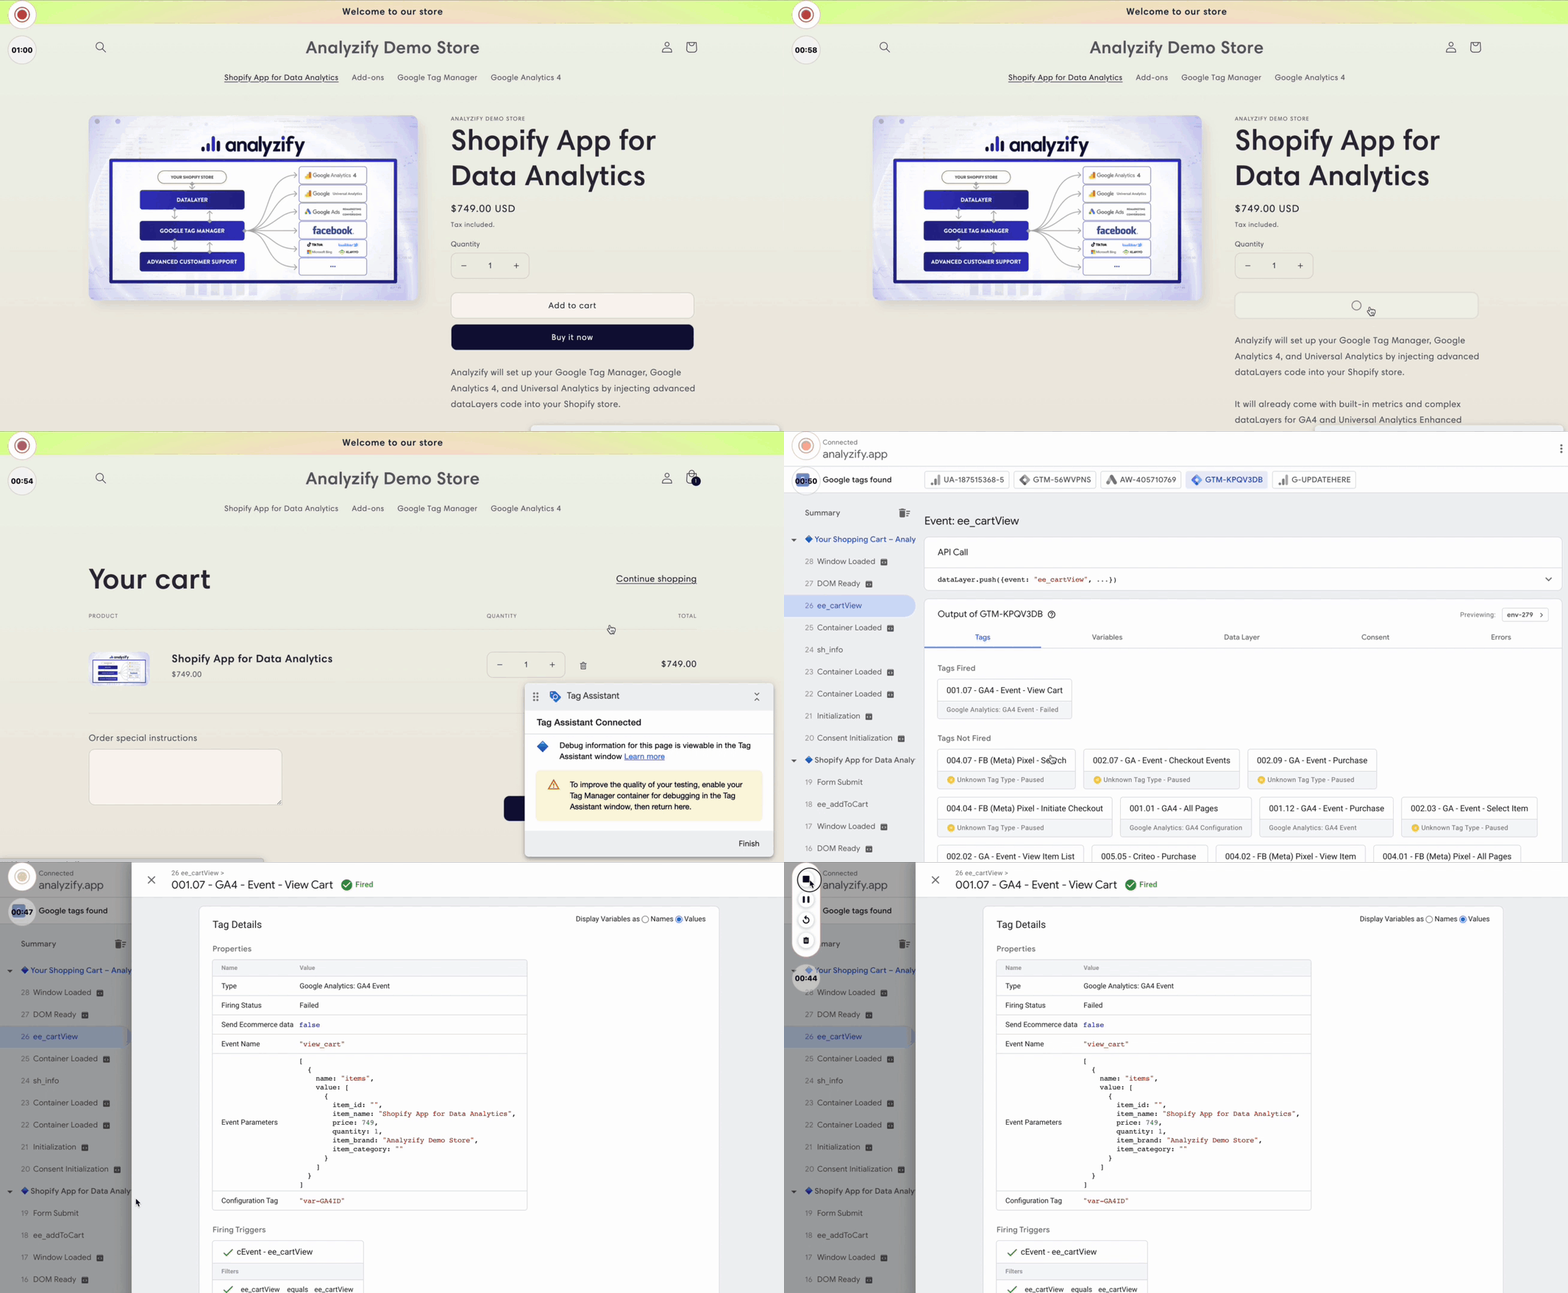
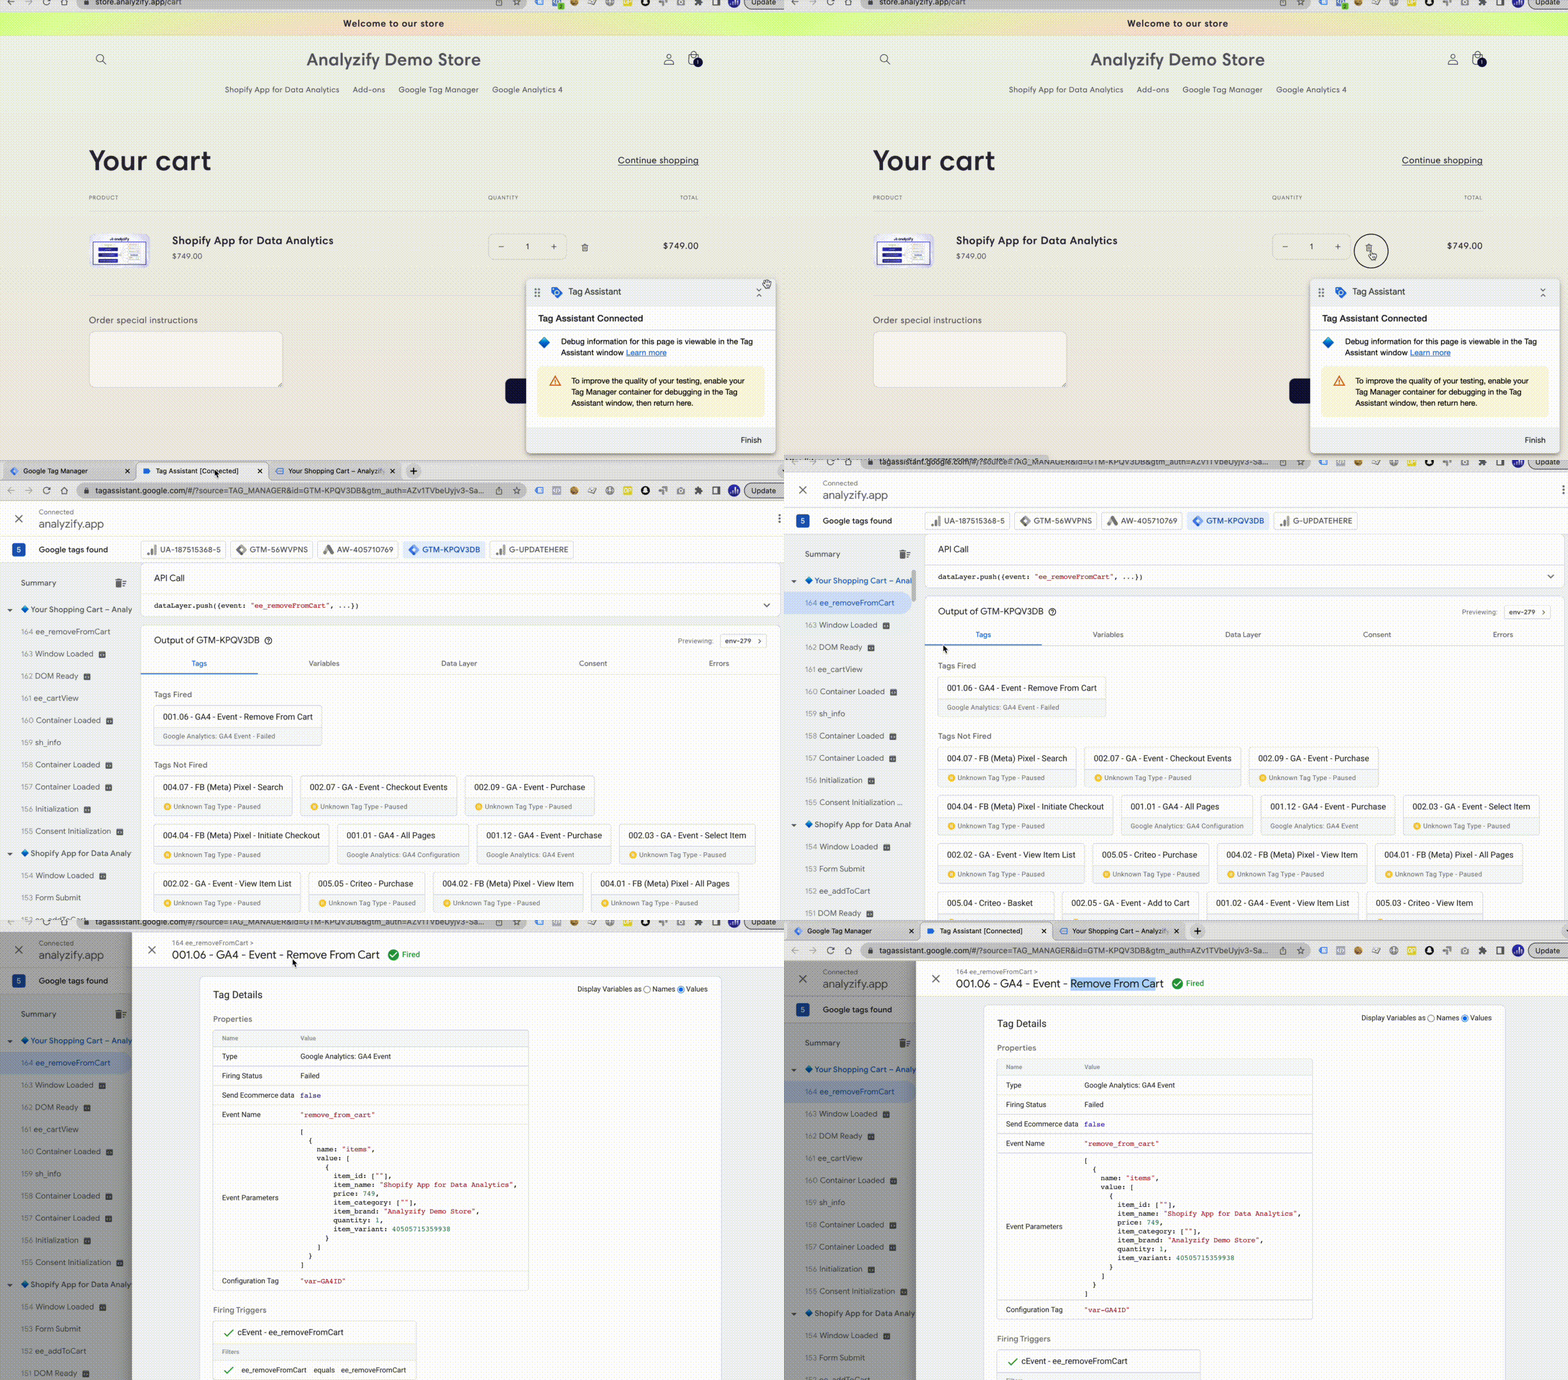
Now, click “remove from cart” button on the cart page then see if the “ee_remove_from_cart” event is being triggered.
Don’t worry if a problem appears here and the event doesn't seem to be triggered. Contact us right away.
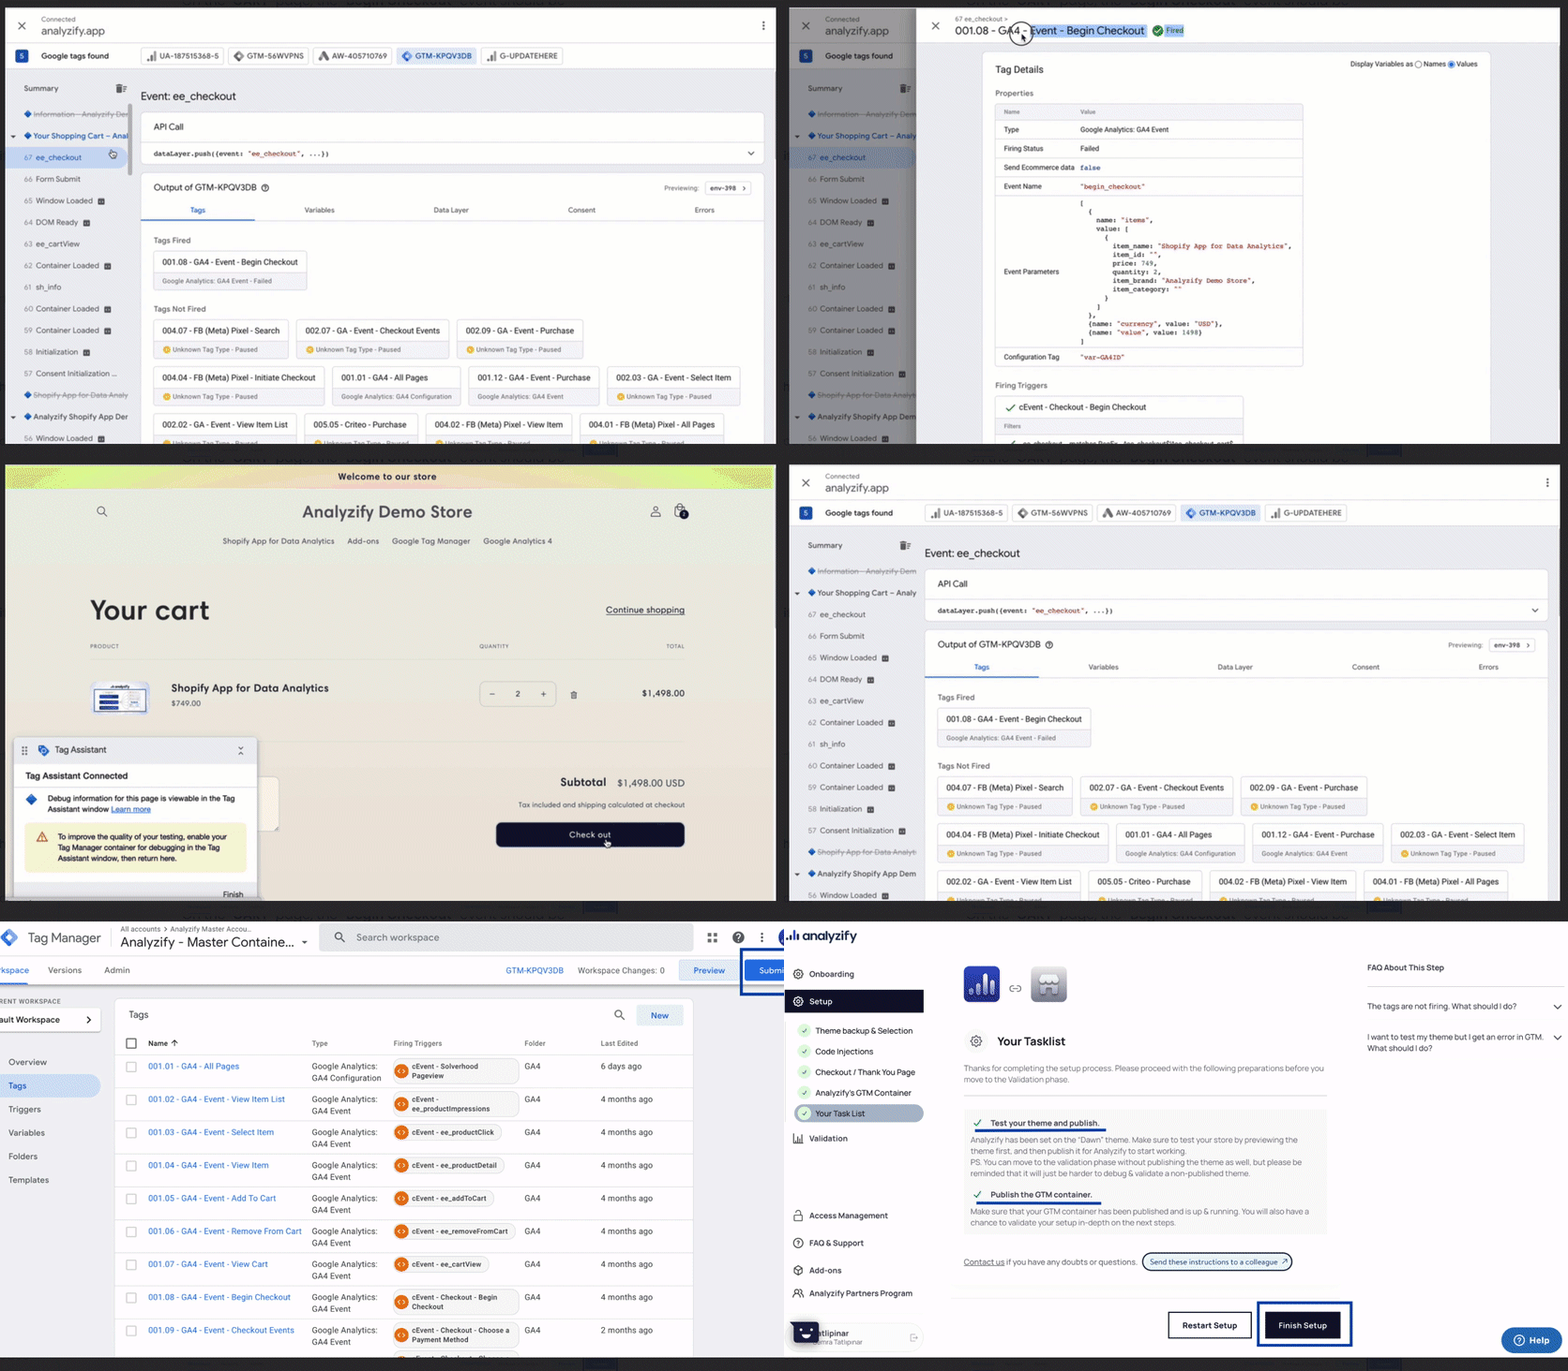
On the "CART" page, the "Begin Checkout" event should be triggered. For non-Shopify Plus stores, the rest of the checkout steps won’t be tracked until the "Purchase" event. As for Shopify Plus stores, they can continue debugging and keep checking the events this way.
After that, do not forget to publish your GTM container.
After publishing the GTM container, go to the Analyzify app panel, and finish the setup process.
Congratulations! You have successfully completed the core setup process. Your efforts have paid off, and we appreciate your patience and hard work throughout this process. Now, sit back and relax while your data begins to reflect in your reports.😉
