The DIY setup requires a little bit of extra care as there are a couple of actions you need to take in order to have a flawless analytics experience. Here are the most important points you should consider when executing your DIY setup.
Beginning of the Setup
1. Create New Google Ads Conversion / Action:
We recommend that you should add a new conversion for Google Ads, instead of the existing purchase conversion, and continue with the setup using that new conversion label.
If there are two purchase conversions, you should set one as the primary and the other as secondary because having two primary conversions causes duplicates of conversions.
You can check out the Create a New Conversion article to set up a new conversion.
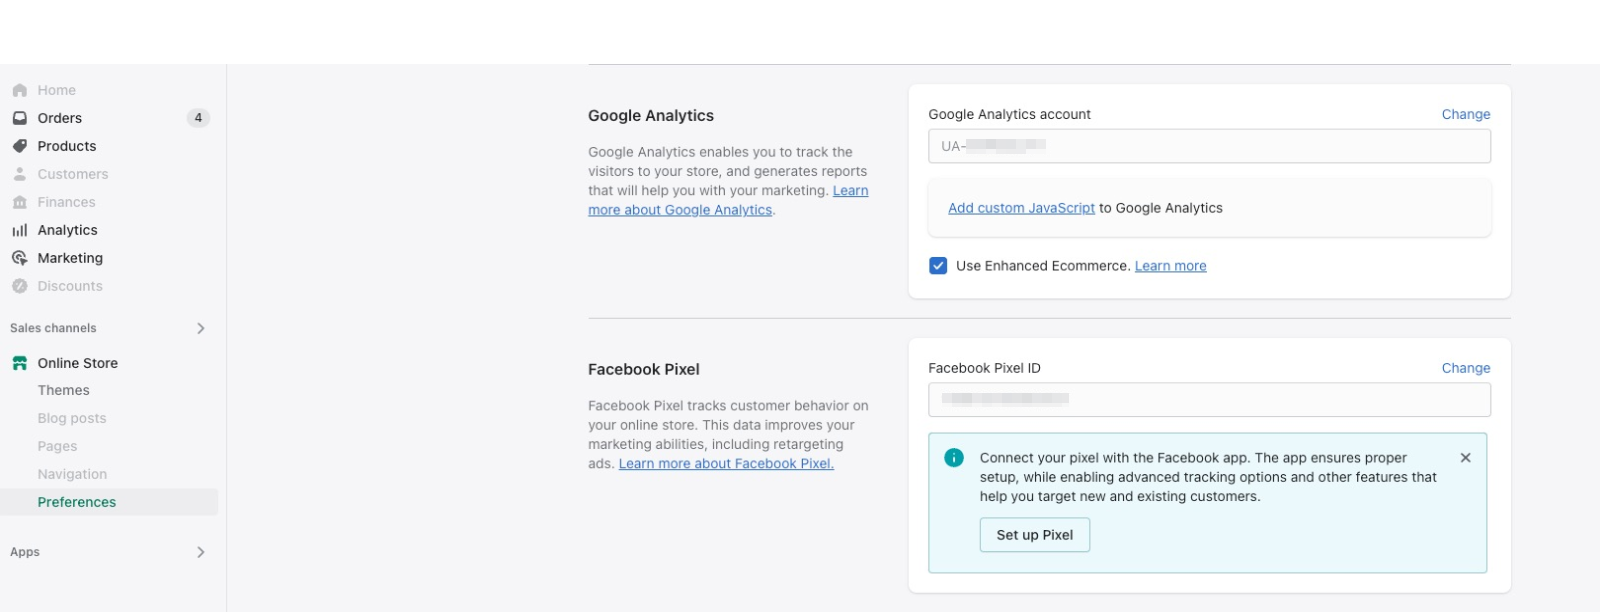
2. Native Integrations of Facebook and Universal Analytics:
As you can see in the setup steps, we recommend that the Universal Analytics and Facebook Pixel integrations remain native. If you are not satisfied with native integrations, you can use our tags. Here, keep in mind that you need to uninstall the native apps. Otherwise, you may encounter duplicated counts.
To do this, head to your Shopify Admin panel > "Online Store" > "Preferences" and delete the related fields .
Setup Process
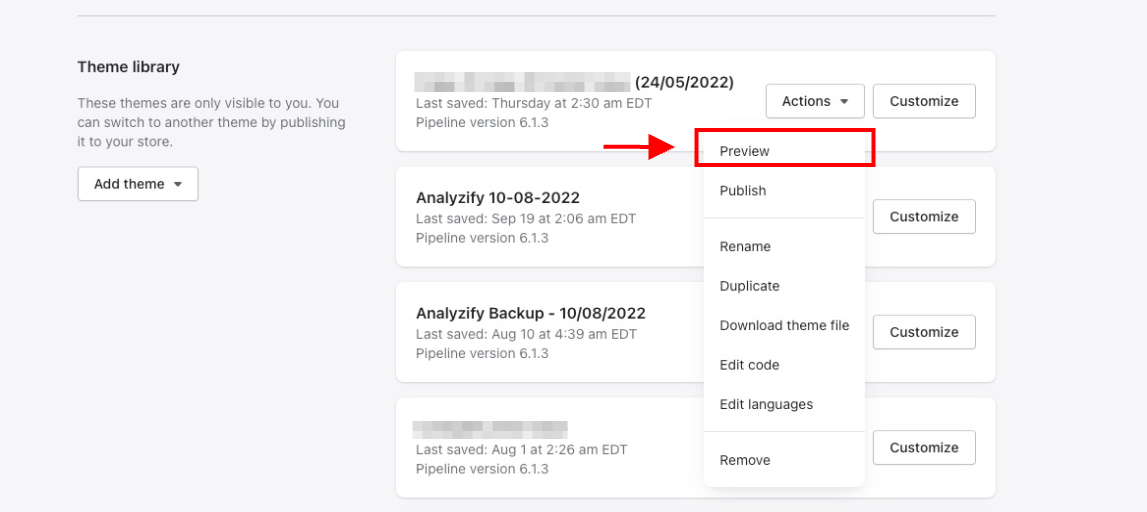
1. Work on a Duplicated Theme:
We recommend that you always execute the integrations on a duplicated theme. After completing the setup, we highly advise that you check your theme by previewing it on Google Tag Manager. Also note that if you try to test with a live theme, your tags will not work, as you set up the codes into a duplicated theme.
Here is how you can get the preview link of the duplicated theme:
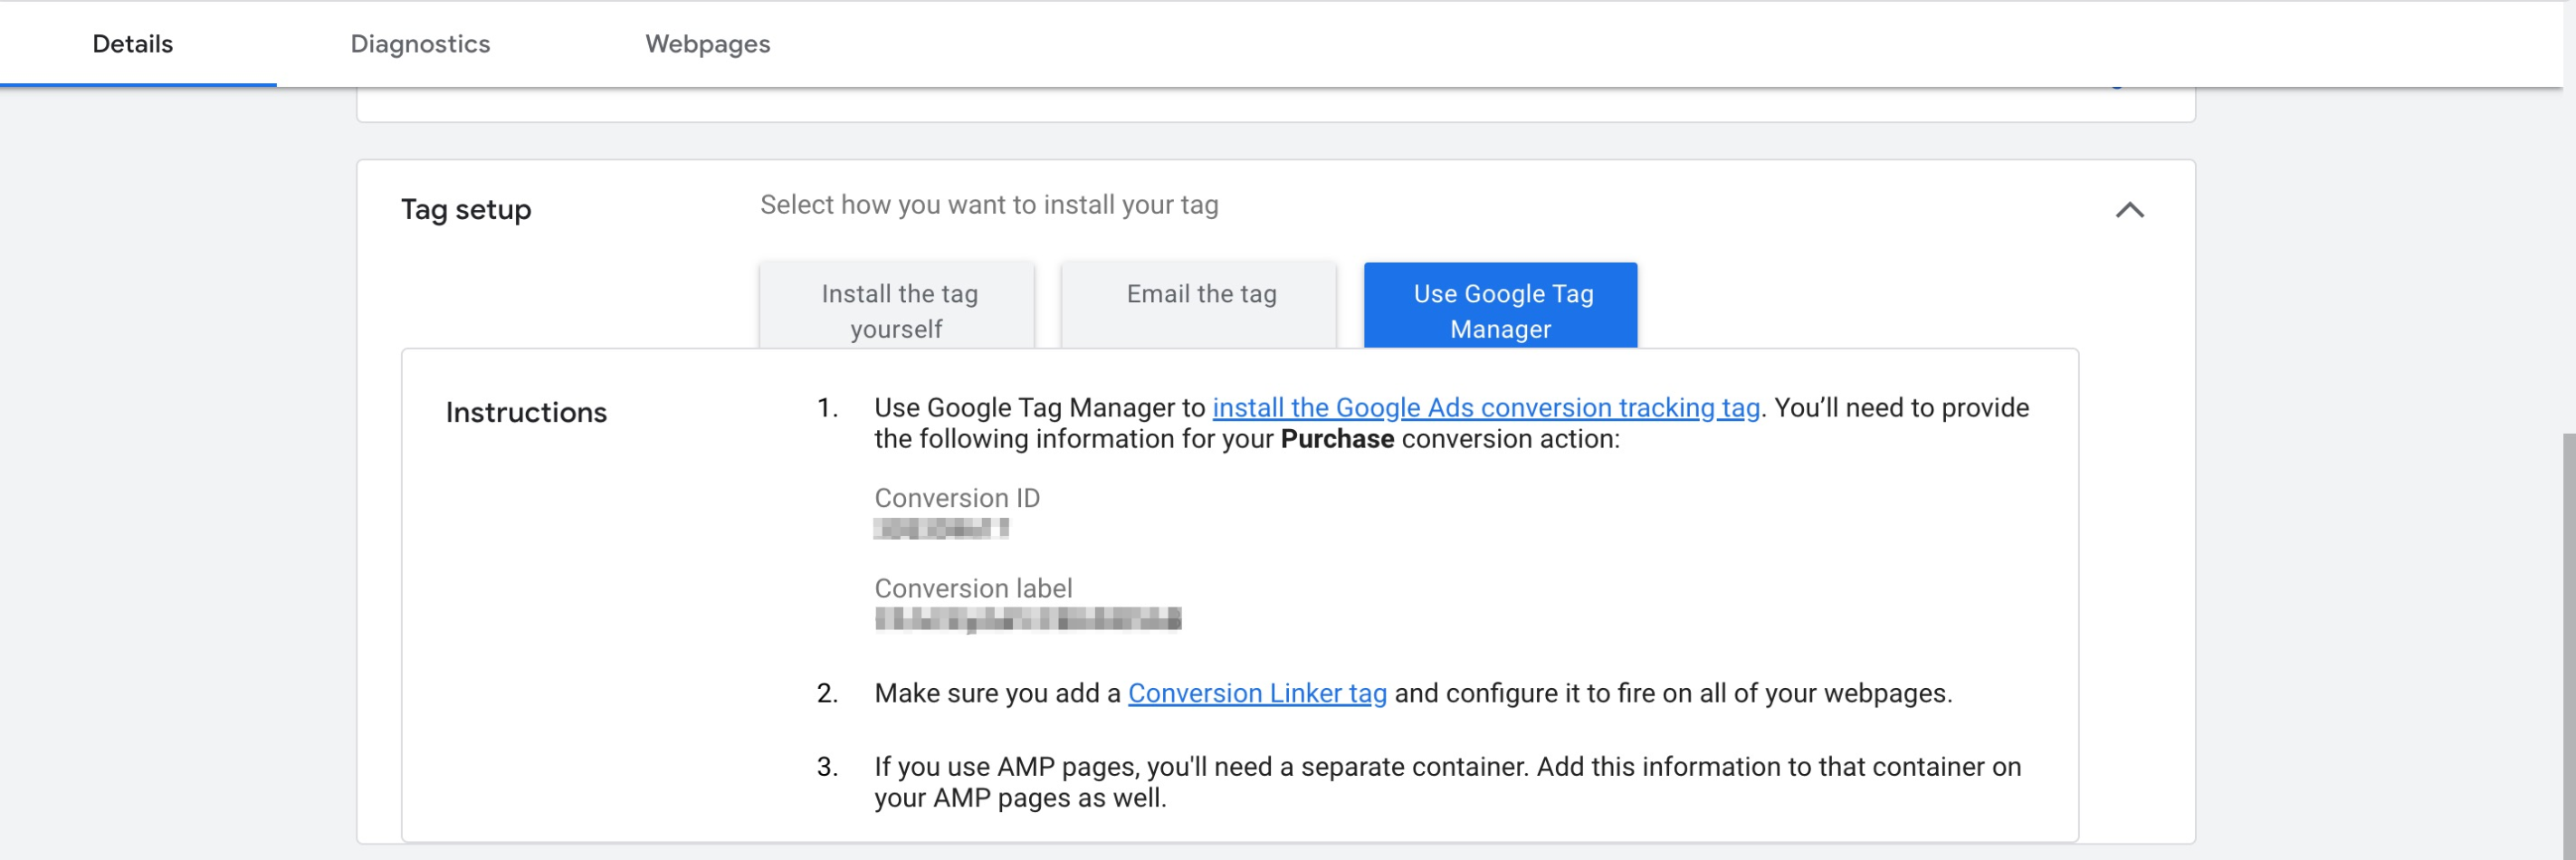
2. Be Careful About the Google Ads Constants:
In the setup steps, we ask you about some parameters for Google Ads integration. One of the most common mistakes made here is that the account number is generally written in the Account ID field. Instead, the conversion ID in the conversion settings should be written there. You can find the right ones here: Find Your Google Ads Conversion ID and Label .
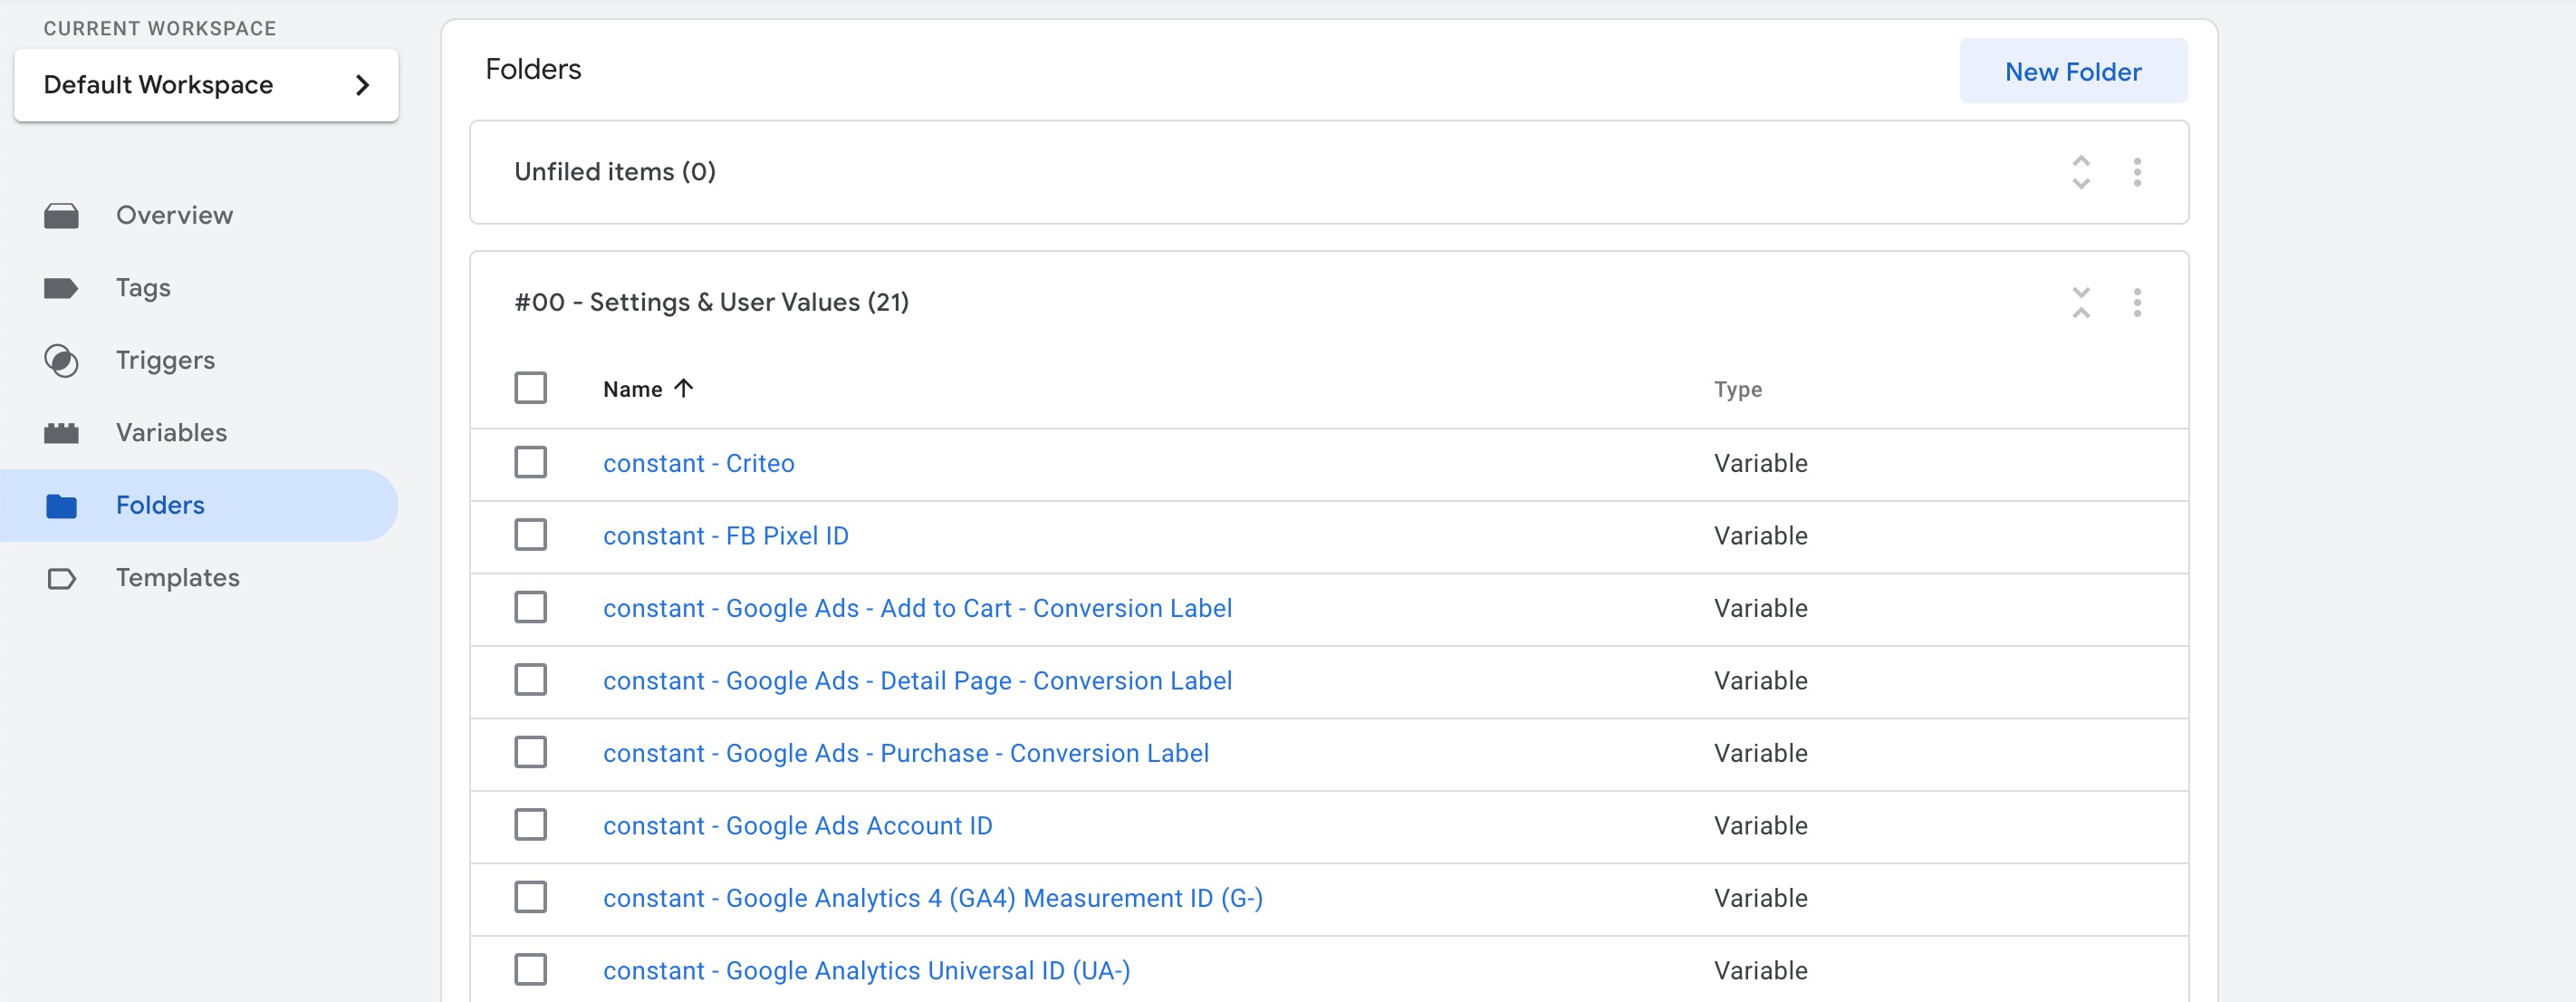
3. Constants that Can Be Modified Later:
After you complete the installation, you can change the constants you provided in the onboarding phase from your Google Tag Manager container at any time. These constants include the Google Ads conversion ID, conversion label, and Google Analytics 4 Measurement ID.
You can check out our Change User Values article to change the user values on your Google Tag Manager account.
4. Other Conversion Scripts in the Checkout Script:
Another issue we encounter frequently after the setup process is double counting issues. In such cases, it is usually necessary to delete the custom conversion codes that were previously added in the current theme and the checkout page. These codes may be of different structures, but this is the first step to check, in case of conversion duplicates.
If the IDs in these codes are different from the IDs you have written to the app, you don’t need to take any action regarding the codes. However, the IDs used both in the Analyzify setup and custom codes can cause serious problems.
Here are the GTM snippets that should be deleted from the "Order status page" ("Settings" > "Checkout and accounts") and the "theme.liquid" file;
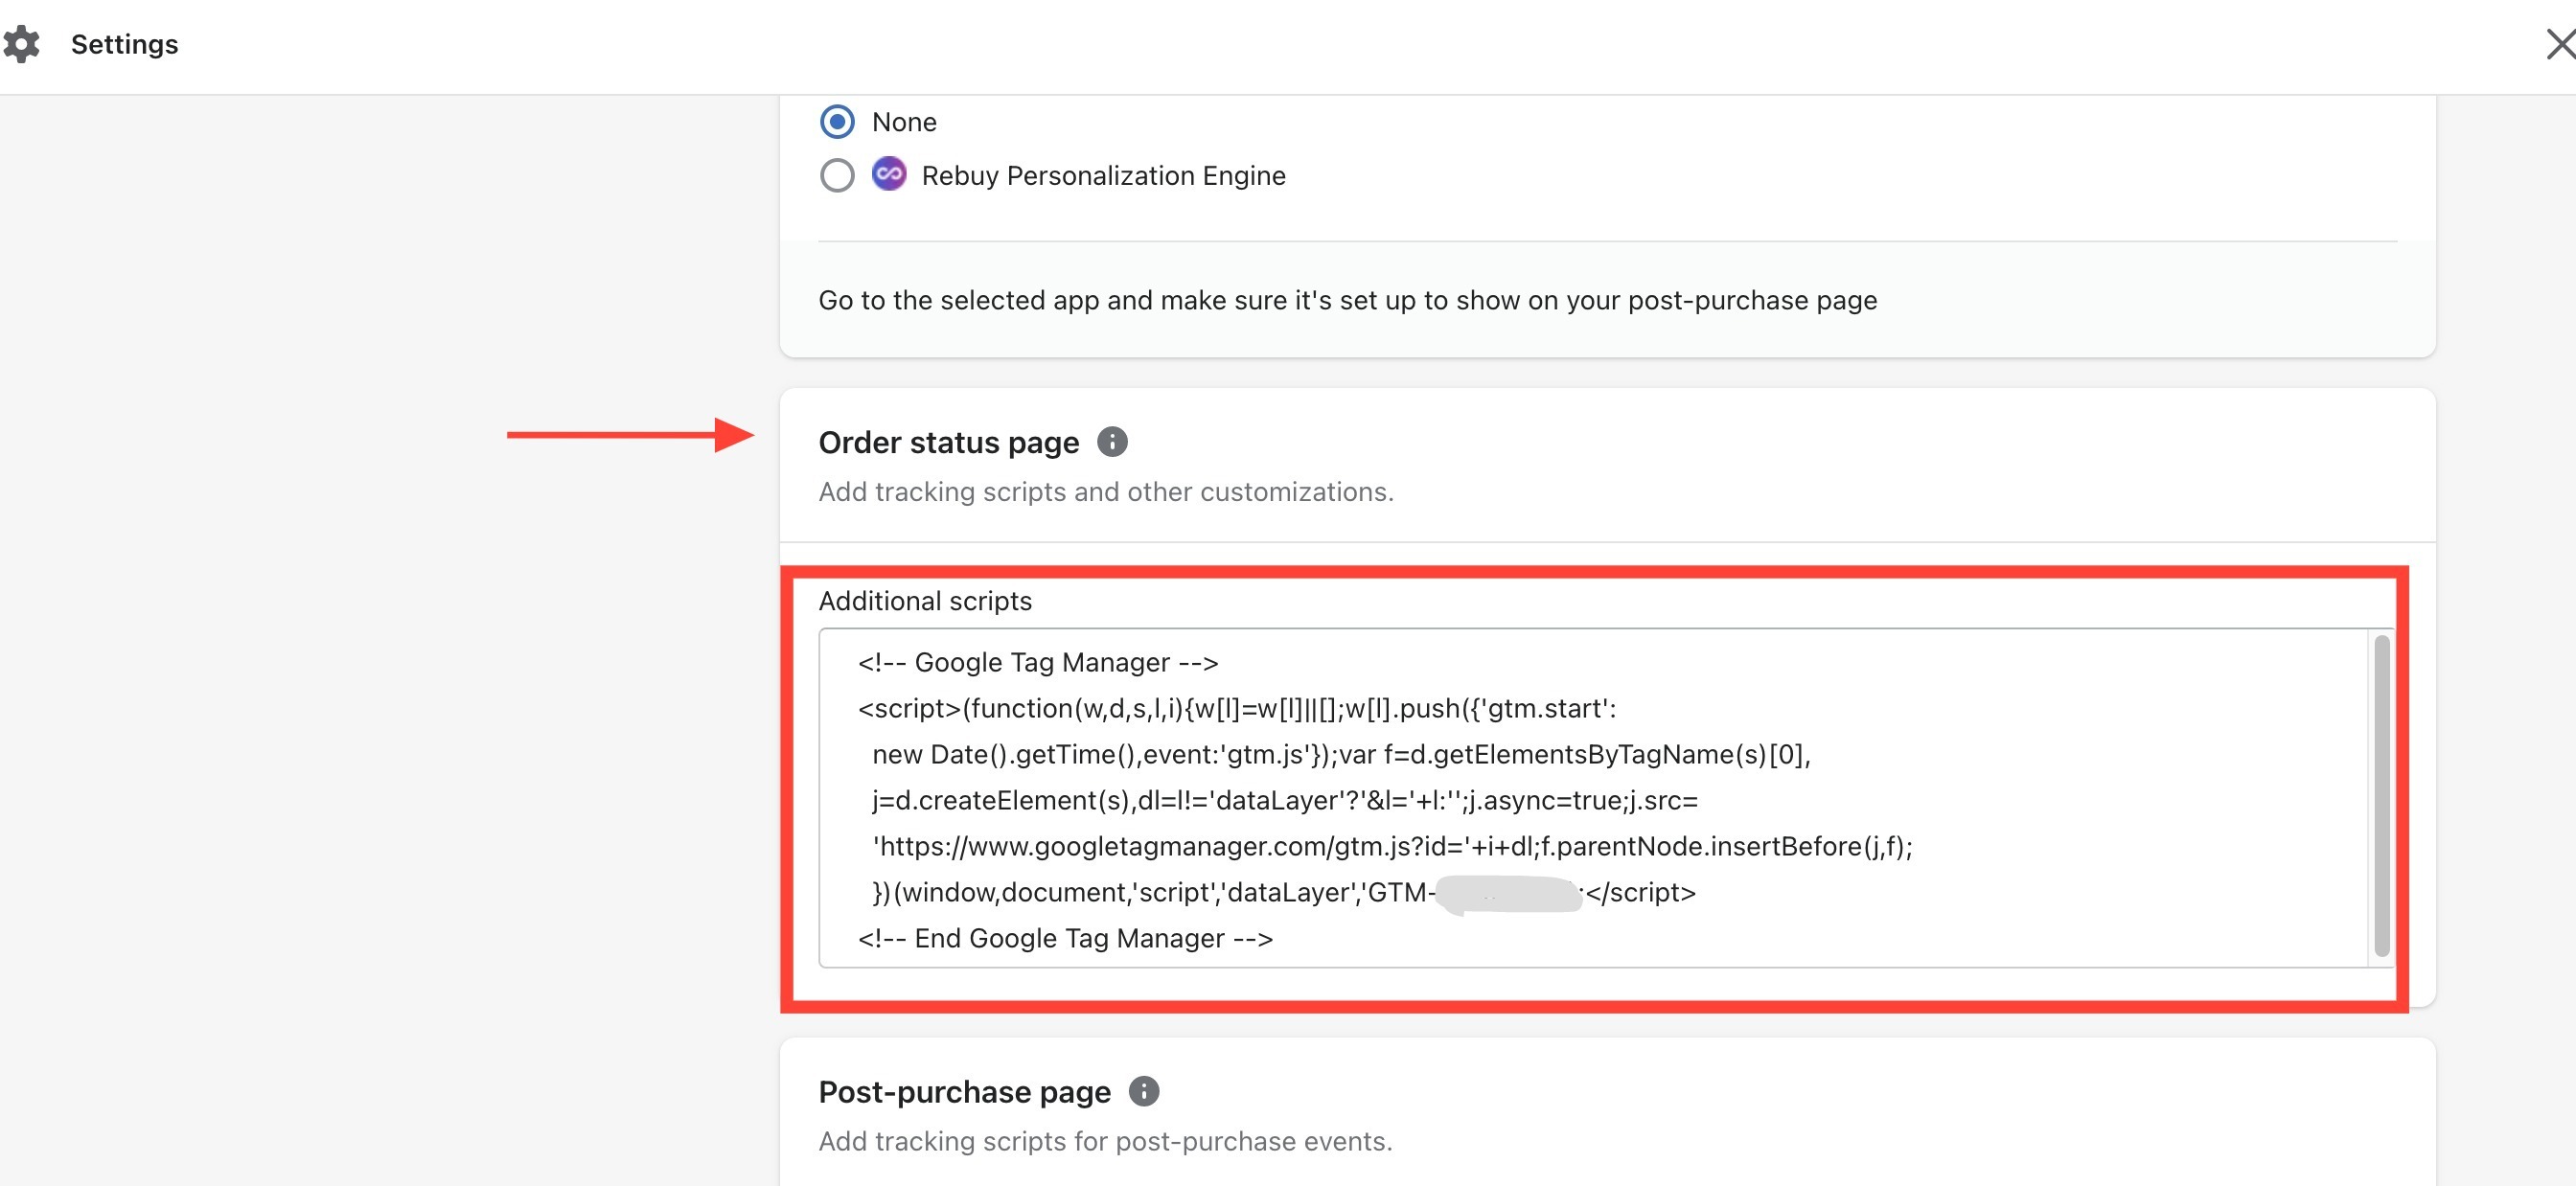
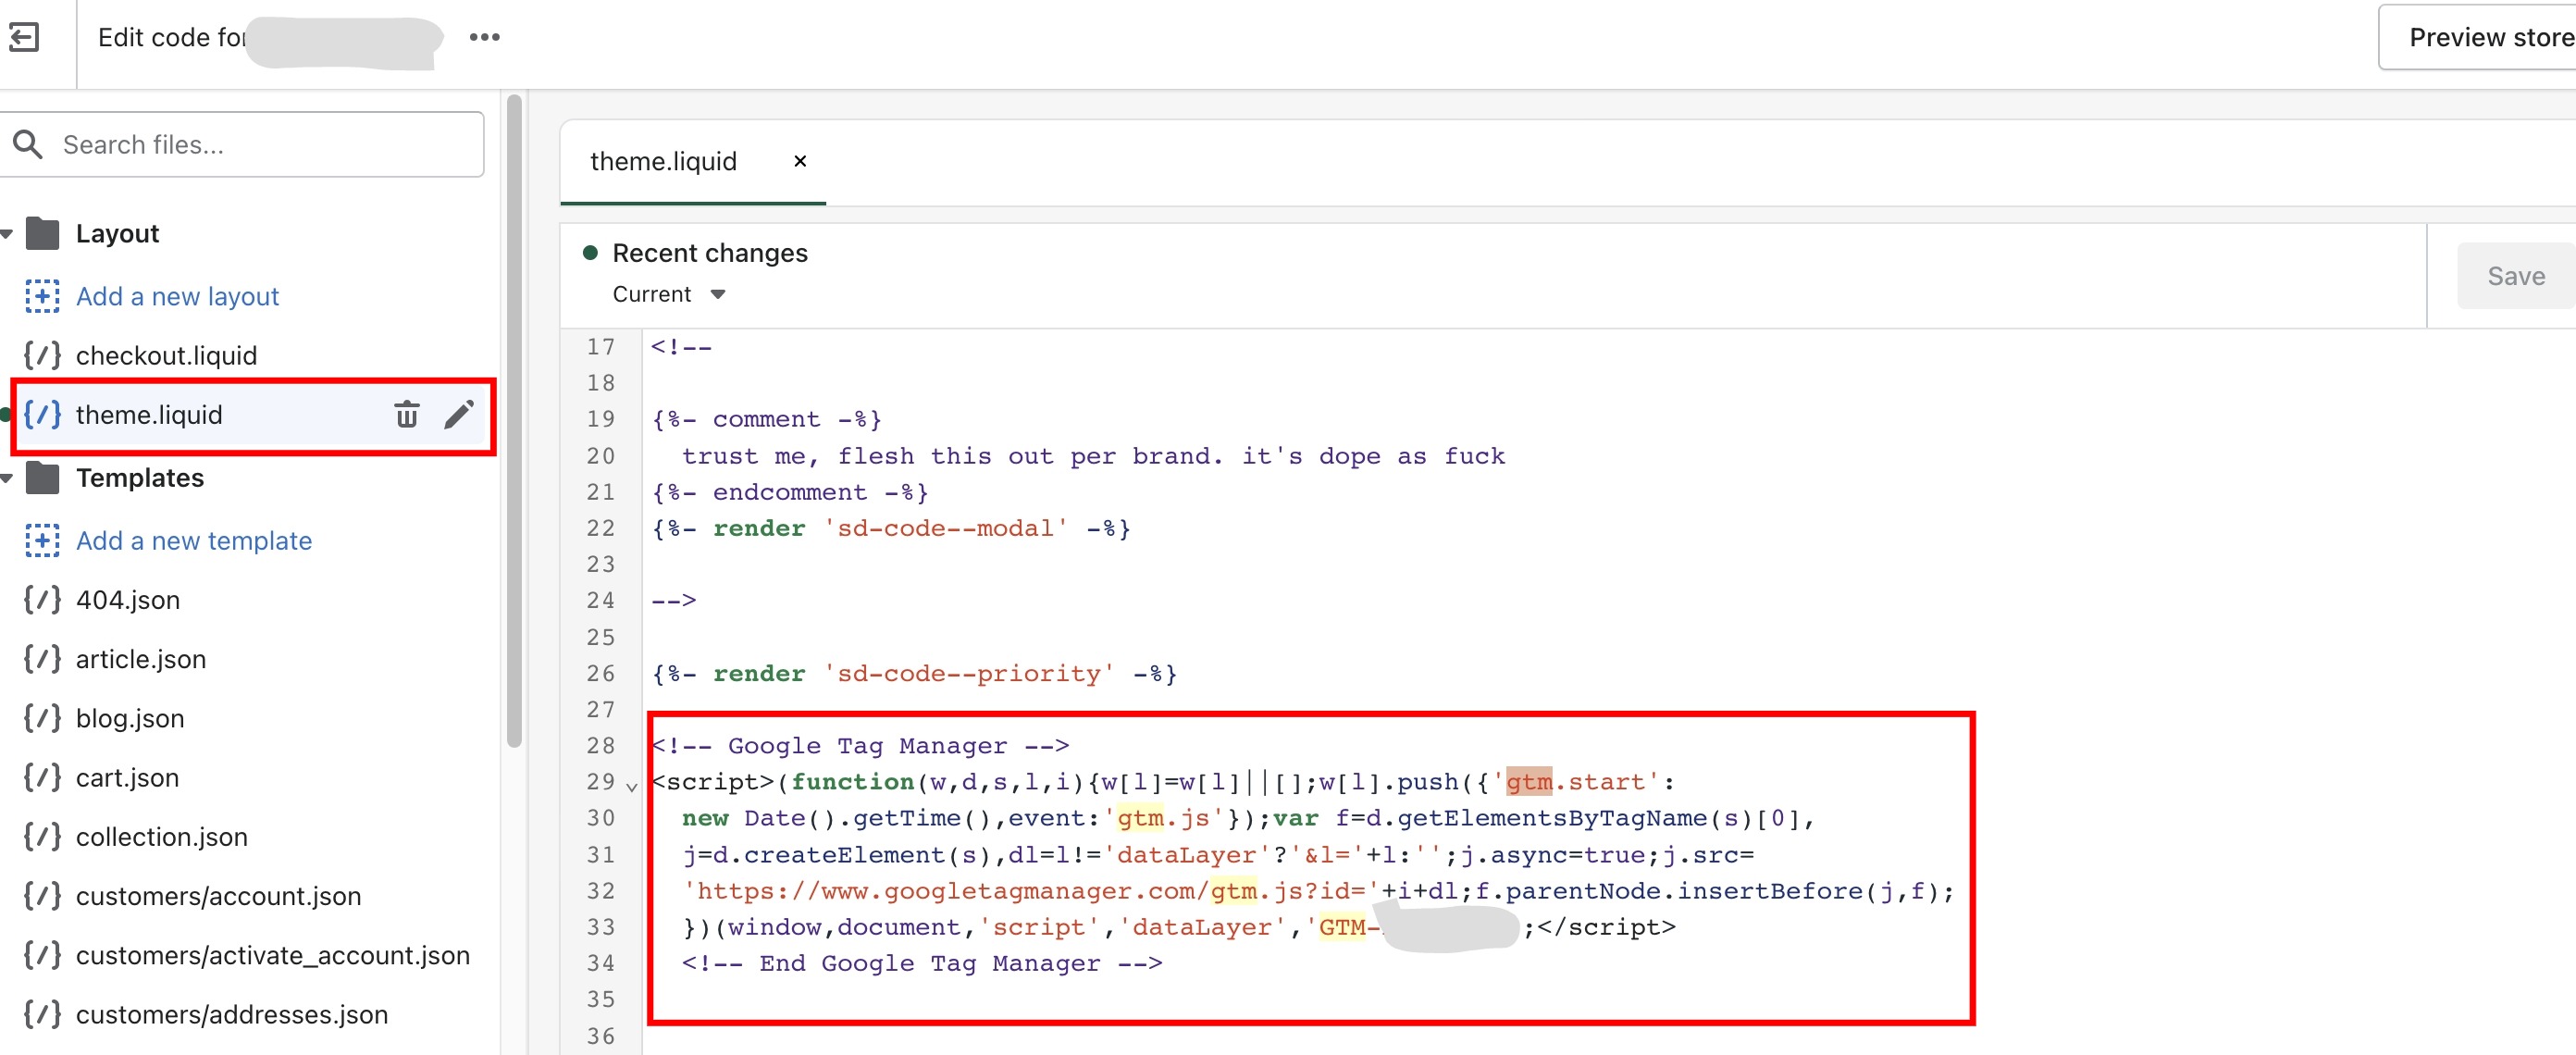
Important: You should remove these codes if the GTM ID is the same as in your setup.
Validation and Further Issues
1. Google Analytics 4 Validation:
Congrats! You have completed the installation and you are now in the validation phase. At this point, you may not see any data flowing to Google Analytics 4, because it takes 24 hours for it to be displayed.
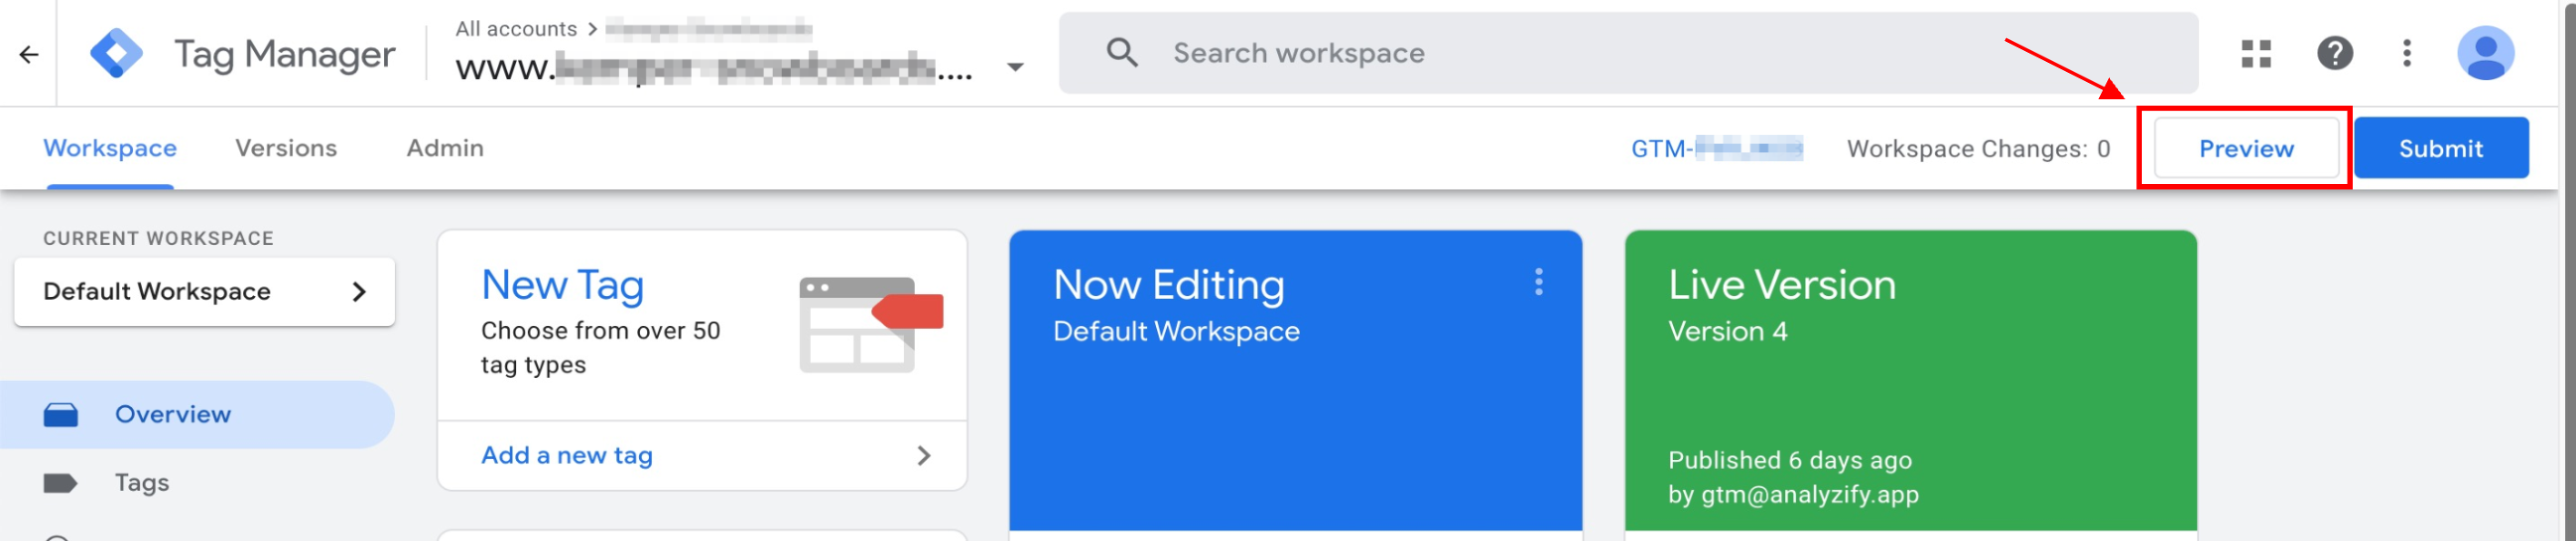
In the meantime, you can preview your current container from GTM and check the status of your tags using our Testing & Debugging Analyzify Setup article.
2. Confirmation Step of Your Analyzify Tags:
You will be directed to the validation phase once you complete your setup process. Here, you should confirm whether all your active tags are working or not, as there are times when the Shopify structure does not let our scripts work properly in some themes. If you encounter such an issue, please let us know so we can take action. You can check out our Testing & Debugging Analyzify Setup for to learn more.
3. What if the Add-to-Cart Event is not Working:
This is the most common validation error we have encountered so far, because the ‘add-to- cart’ and ‘remove-from-cart’ events do not work from time to time. Do not hesitate to contact us in such cases as our technical team will do their best to resolve your problem as quickly as possible. Also our Add-to-Cart Event Not Working as Expected article can help you to learn how to solve this issue.
4. What if You Want to Change Your Theme:
You may decide to switch to a new theme after some time. If so, it’s important to note that you should start your Analyzify setup from scratch. You can do this easily by going to the app, starting the setup process from the beginning, and choosing your new theme. You can take a look at the Theme Updates & Changes - Set up Analyzify on a New Theme article to learn how to reinstall Analyzify into your new theme within minutes.
More Tips about Setup
1. If you wish to check more details about GTM container and settings, you can take a look at our GTM Account Tutorials article.
2. Google Ads Account Tutorials can help you configure your Google Ads in a better way.
3. You can validate your GA4 data by debugging or checking data from the panel. In our GA4 & Shopify Data Validation article, you can learn how to check it without the debug mode.
