To upgrade to Analyzify v3.3, you can follow the instructions below.
Many changes and improvements have been made in different areas in the new version of Analyzify.
Before explaining how to perform this upgrade, let’s see what's new in Analyzify v3.3:
What's New?
1) Analyzify Advanced setup now uses App Embed: The setup of Analyzify Advanced integration now calls the necessary codes from within Theme > Customize > App Embed, instead of directly injecting code into your theme file.
2) GTM on Shopify Customer Events: The setup of Analyzify Advanced integration can now integrate GTM into Shopify's newly released Customer Events feature, sending events such as "add_contact_info”, “add_shipping_info”, “add_payment_info”, and “purchase”, at the Checkout step to the desired destination(if applicable) via Google Tag Manager.
3) Analyzify dataLayer structure: The data pushed to the Analyzify dataLayer is now in the Google Analytics 4 e-commerce data structure.
4) Built-in Google Consent Mode Arguments for Customer Events: Due to limited external access to Custom Pixels created through Customer Events, we will be managing the mandatory consent arguments to be included with data sent to Google products (if you have a GDPR compliant setup) directly from within Customer Events by reading Shopify Consent Cookies.
5) Google Tags Advanced Setup: The Google tags within GTM now also support Cookieless pings (a.k.a Advanced Setup). This means that Google can use this data to model your Conversions, Session, or Event Count numbers, allowing for the use of this data. In this setup, tags are triggered cookieless without waiting for the customer's consent preference. Then, they are updated according to the customer's consent preference.
Keep on reading to continue with Analyzify v3.3:
Upon opening the Analyzify app, you will be greeted by the Dashboard page.
Here, you need to click the Restart button next to the Onboarding step as shown in the screenshot.
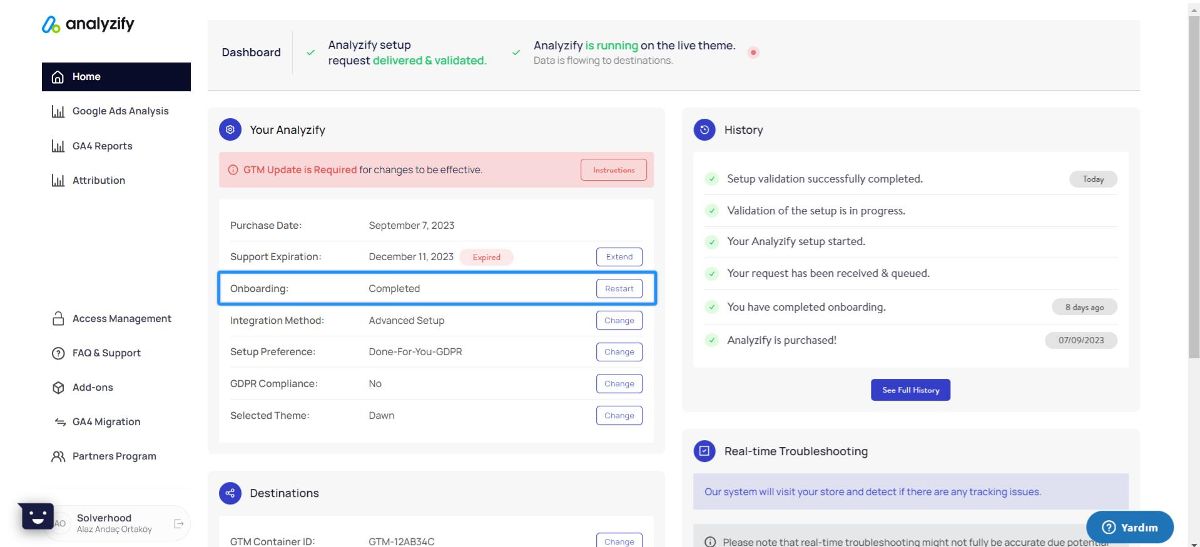
If for any reason you do not see the Dashboard page as in the screenshot above, we kindly ask you to navigate to the Onboarding section using the menus on the left side.
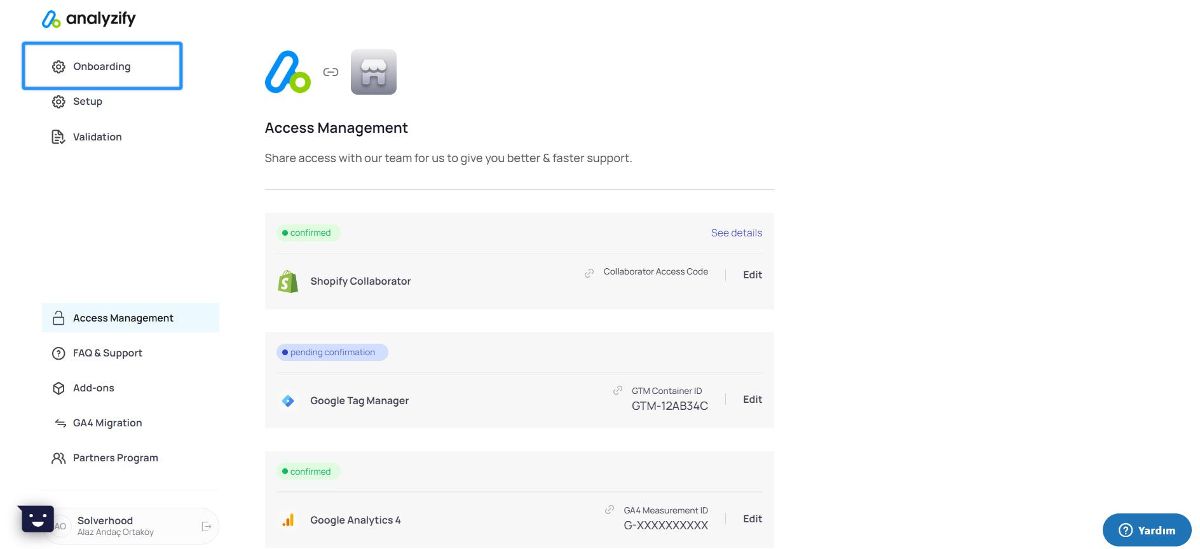
Onboarding
The Onboarding step is where we collect the necessary information from you to automatically assign your IDs in the Analyzify source code and within Google Tag Manager to the relevant variables. Since you have already completed the setup process once, these values will be presented to you as the last values you entered in the steps.
If any of these values have changed, we kindly ask you to change the relevant value and complete all the steps in order with the help of the instructions below.
Select Advanced as the Setup Method
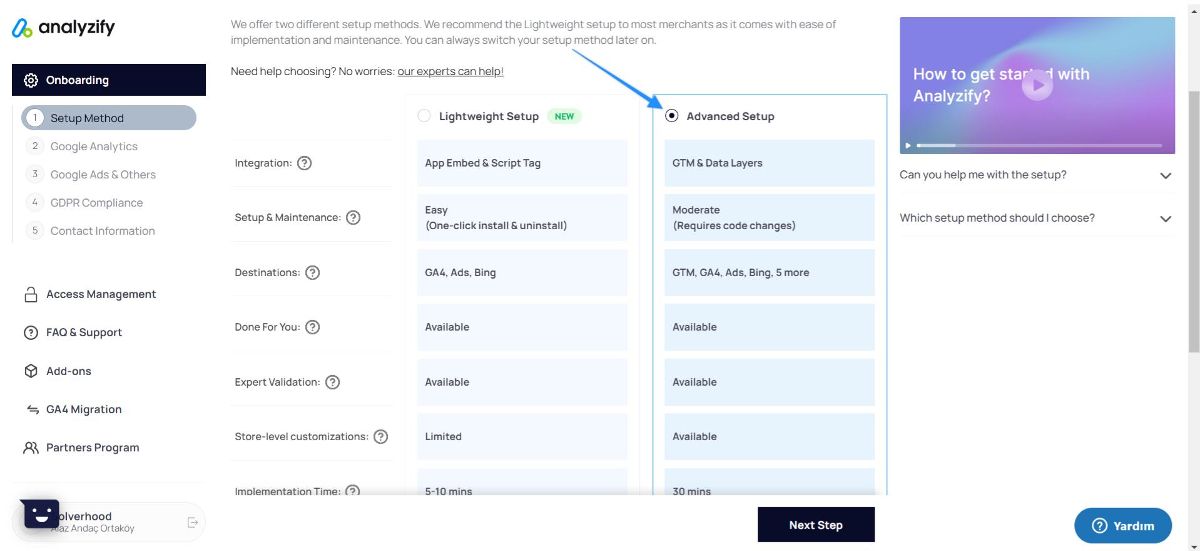
Then check the GTM ID and choose the “ Start the setup yourself ” option followed by clicking Next Step.

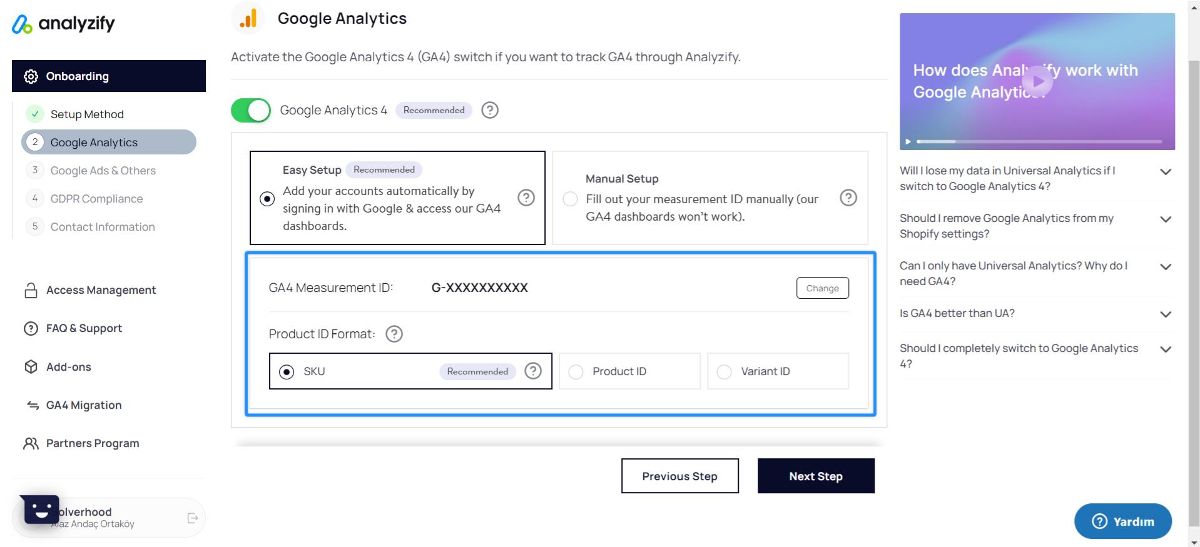
Here, you can either choose the Easy Setup or the Manual Setup. In both methods, the Google Analytics 4 Measurement ID and the IDs of the Products to be sent to Google Analytics should be checked and changed if desired.
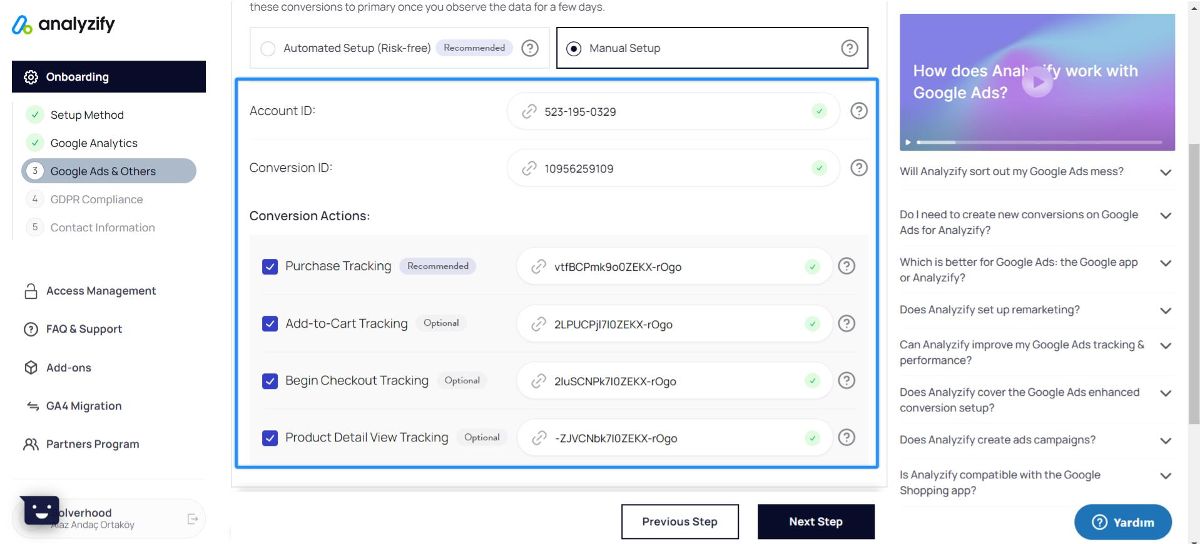
You have two options for Google Ads & other integrations setup, just like the GA4 part: 1- You can choose the Automated Setup in order to authenticate with your Google account and select your Google Ads account for Analyzify to create new Secondary Google Ads Conversions. 2- You can opt for the Manual Setup to enter the values here manually, just as you can see in the screenshot. If you are already using the IDs, then no change is necessary.
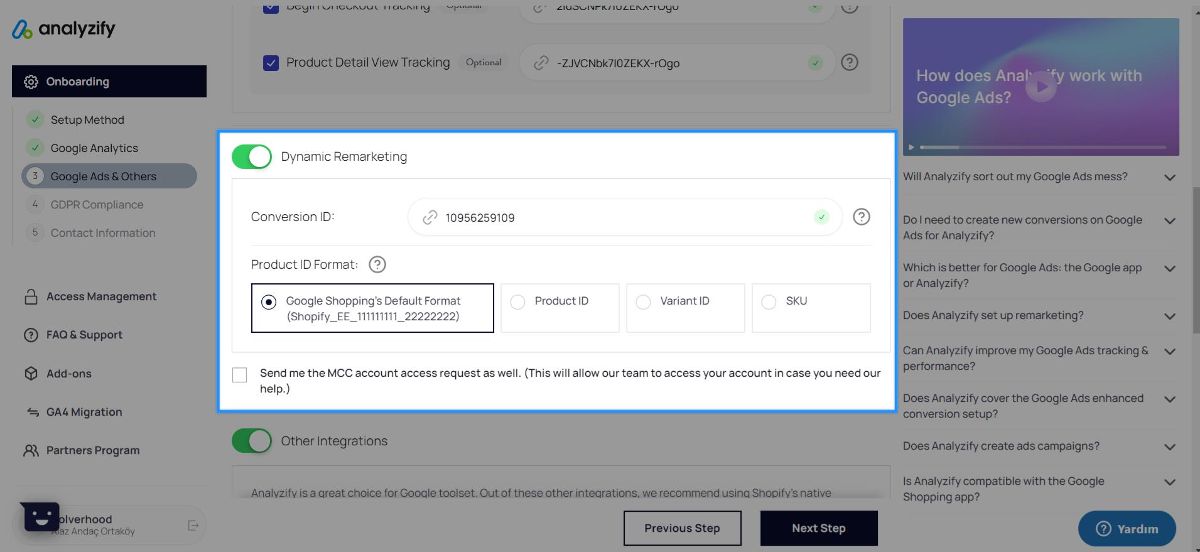
Switch the Google Ads Dynamic Remarketing toggle to activate it.
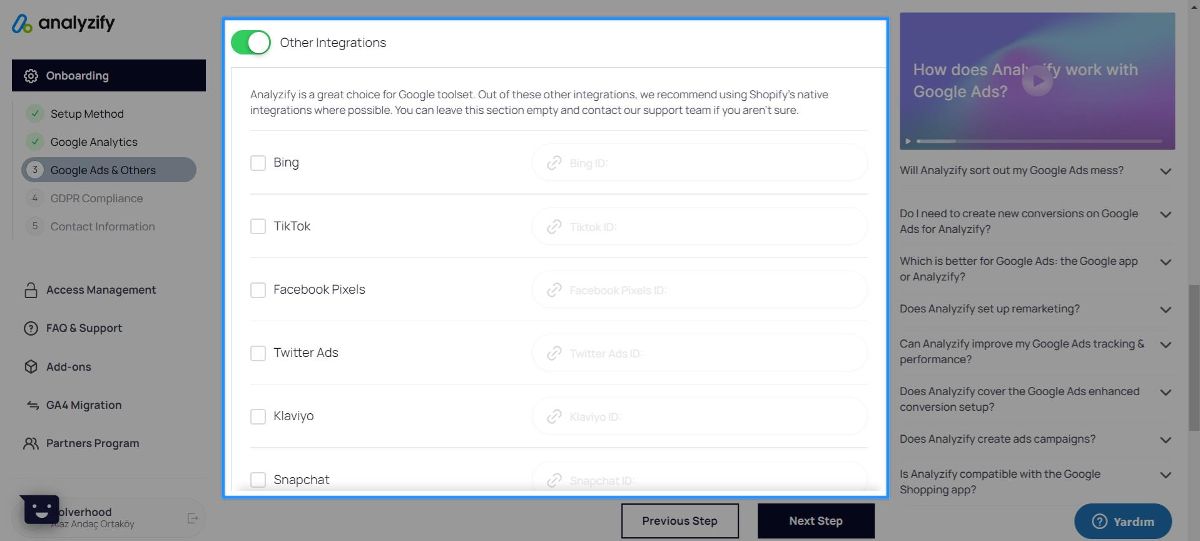
Switch the Other Integrations toggle to activate them if you want to connect.
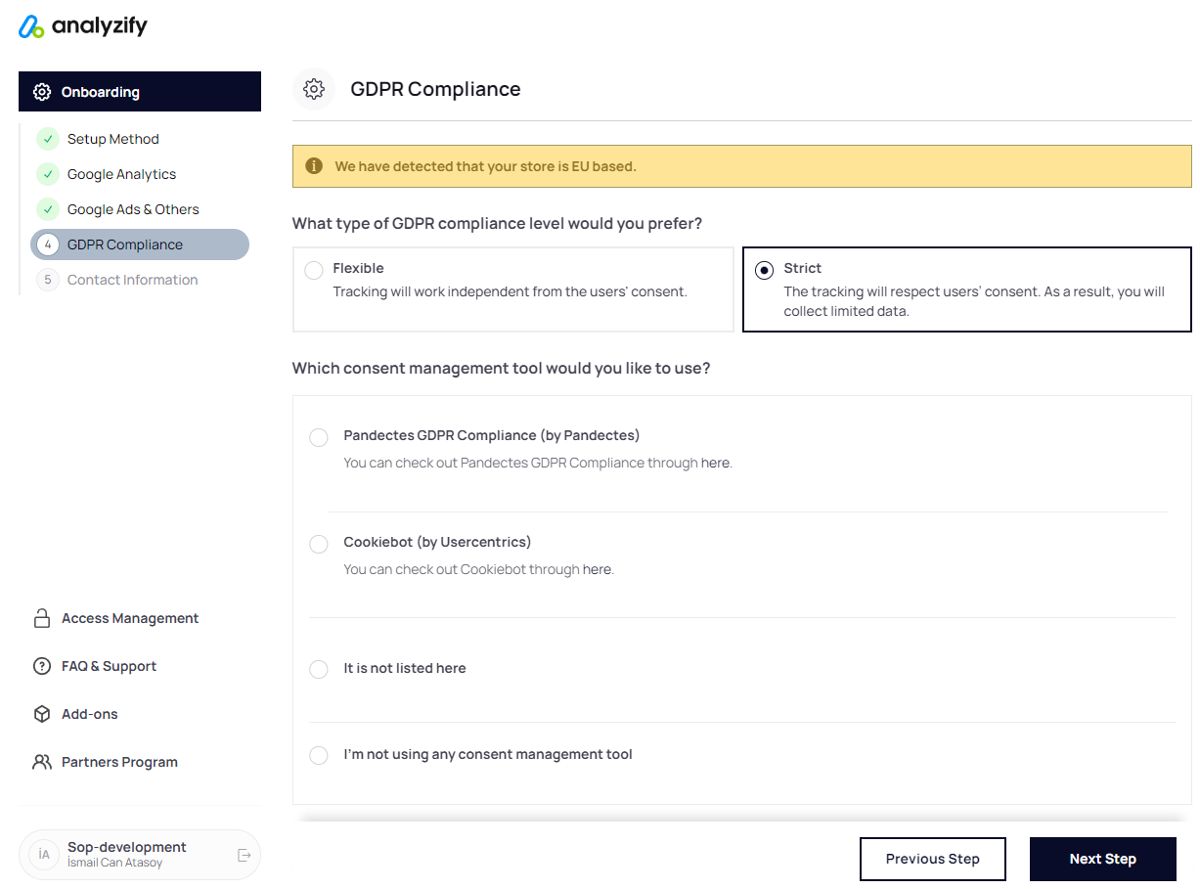
Here, you can choose either the Flexible or the Strict option based on your needs.
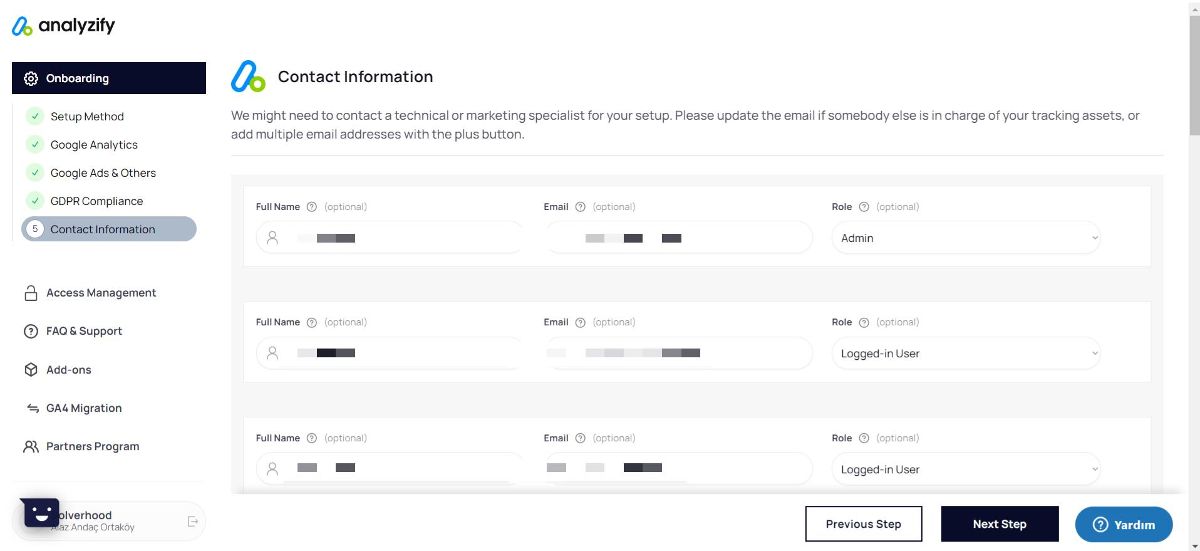
Add/edit the necessary information in this step and proceed to the Setup phase.
Setup
The Setup step is where Analyzify is integrated into your source code and the GTM JSON file, Customer Events codes that you need to use based on the information you filled out in the Onboarding step are shared with you, and the setup will be completed.
Setup Analyzify
This is the first step that greets you right after the Onboarding step is completed.
Immediately after the Onboarding step, it checks your live theme's source code and warns you if there are any:
Because, as mentioned at the beginning of the document, Analyzify no longer injects code directly into your theme file but calls the necessary codes from the App Embed section. To prevent double-counting issues you have to delete these lines in your main files.
If you encounter such a warning;
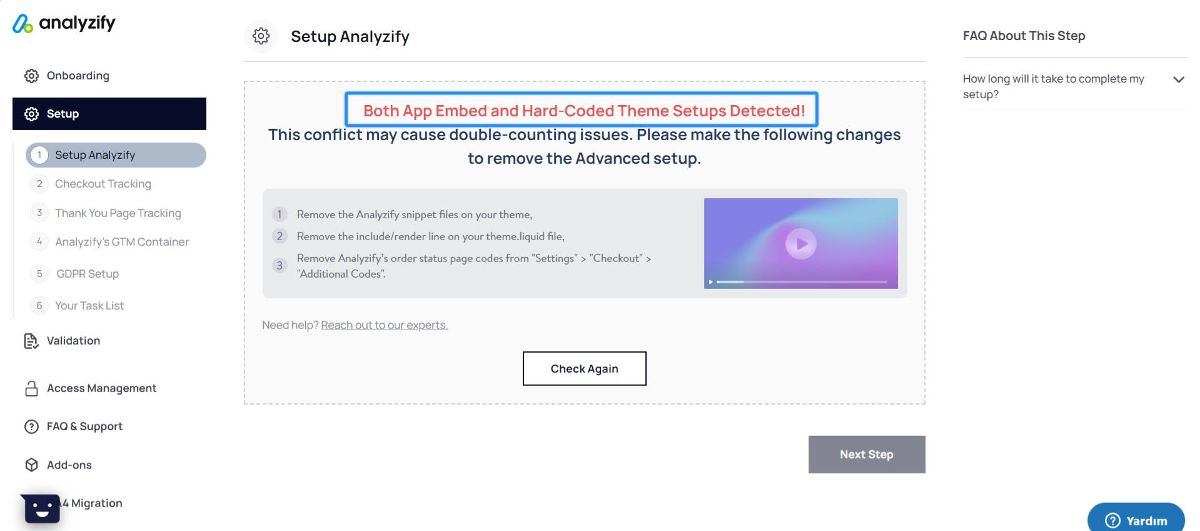
Here is what you need to do:
Go to your theme.liquid and checkout.liquid files, and delete this line: “ {% include "analyzify-gtm-body" %}”
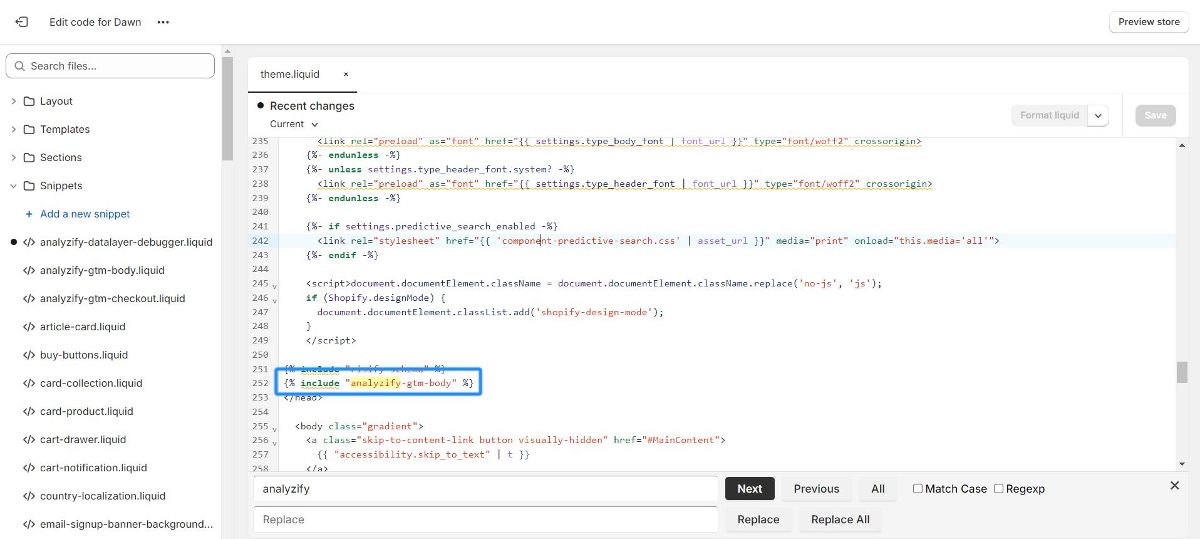
You should also delete {% render 'analyzify-gtm-checkout' %}
After deleting these lines from the theme.liquid or checkout.liquid files if applicable, you can click the Check Again button again. When Analyzify correctly detects that these lines have been removed from your Live theme, it will direct you to the necessary step for activating Analyzify App Embed integration. You can activate the Analyzify App Embed integration on any theme without needing to visit the Analyzify App again in the future by following the steps here
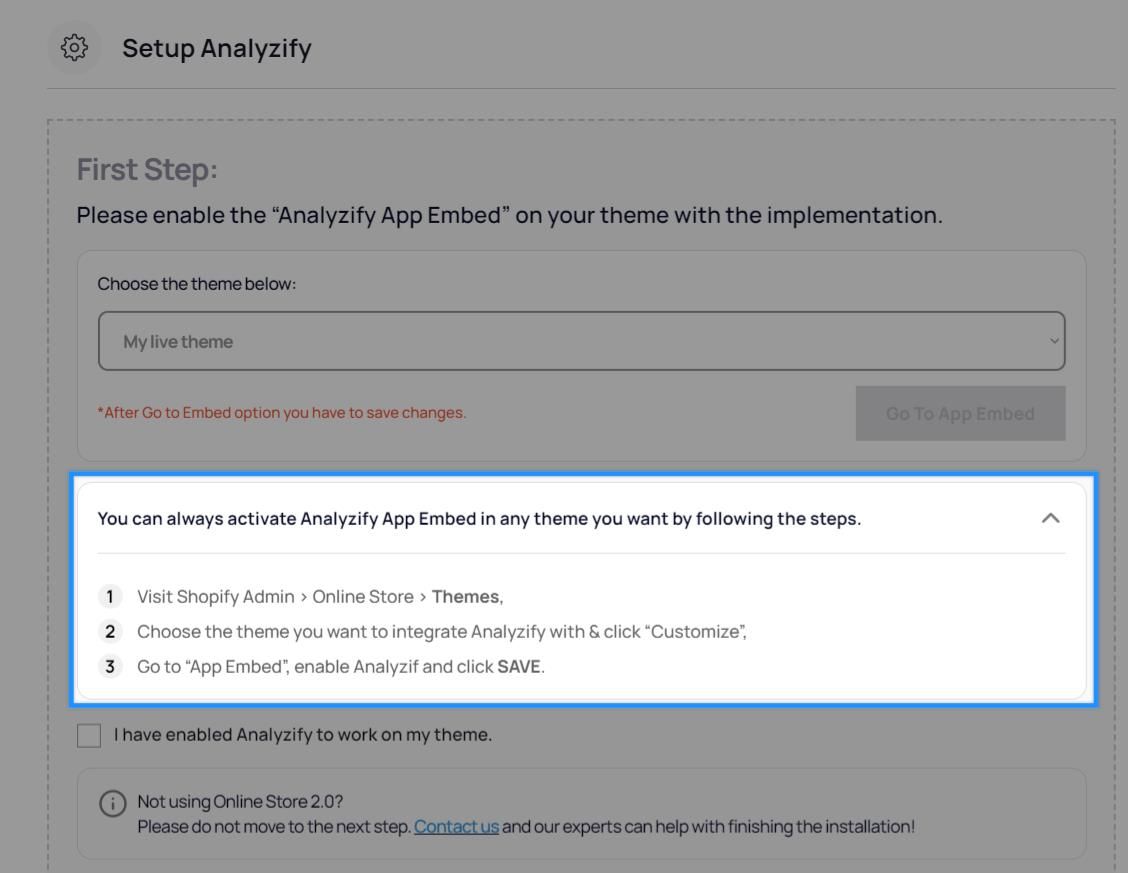
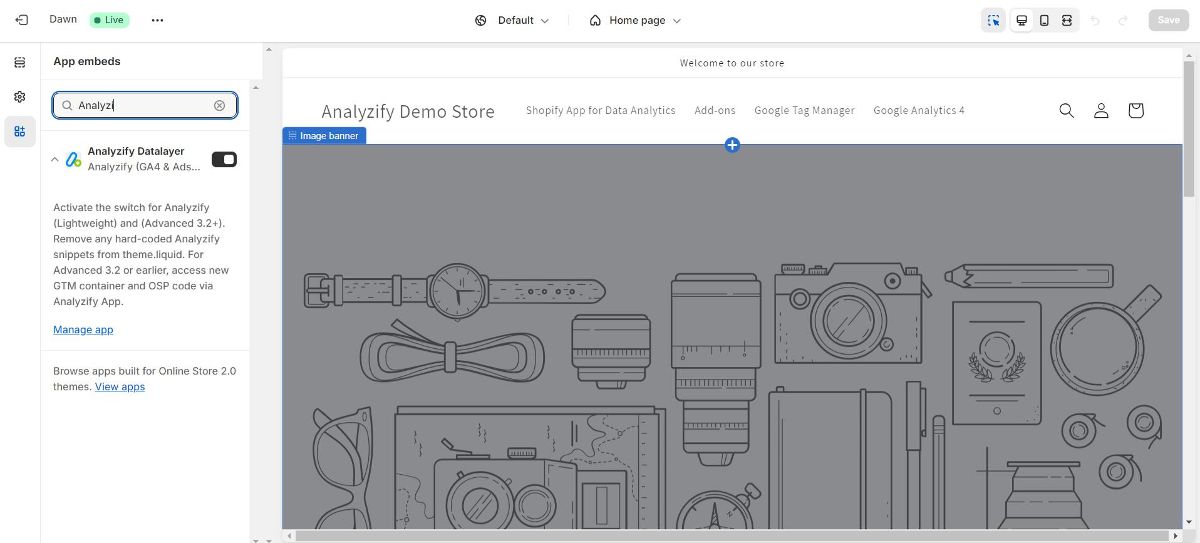
If you activate for the first time, select the Live Theme from the drop-down menu and click the Go To App Embed button
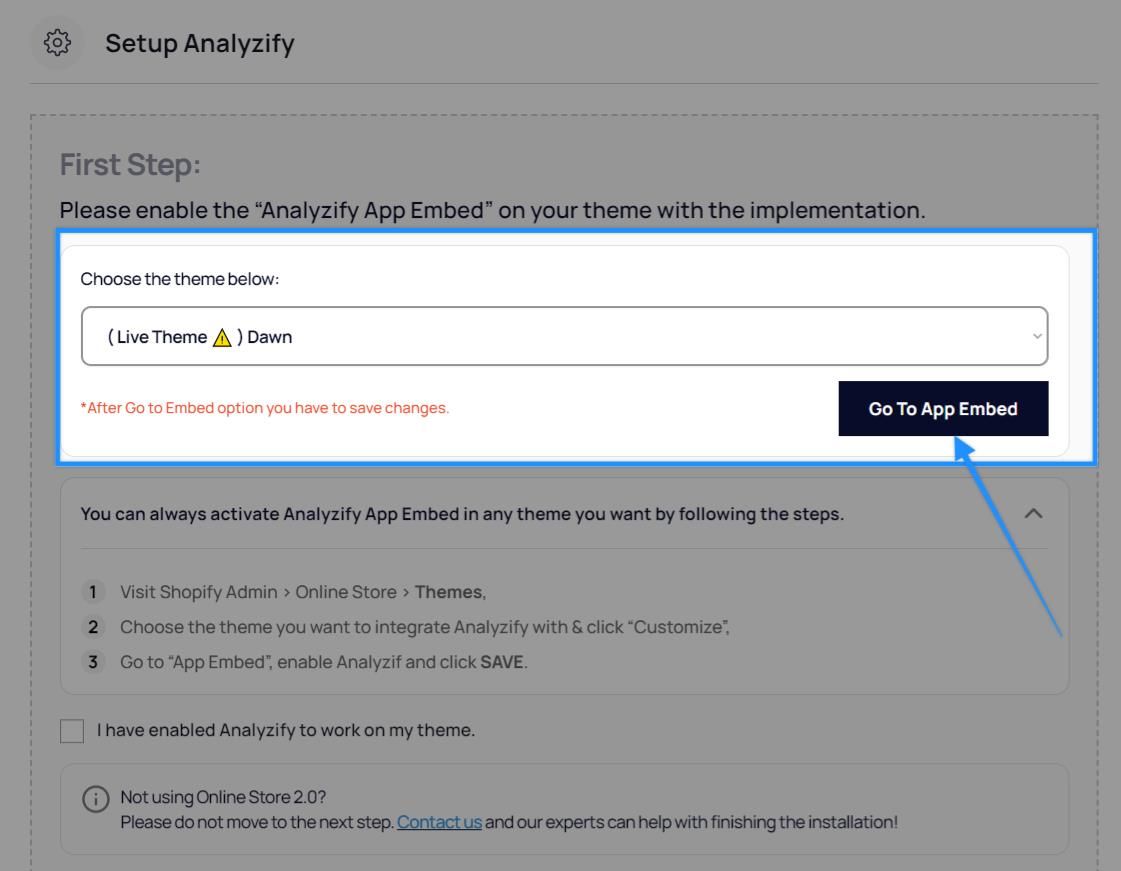
This button will set the Analyzify App Embed Toggle to active in a new tab in the selected theme. All you need to do is click the Save button to save the changes.

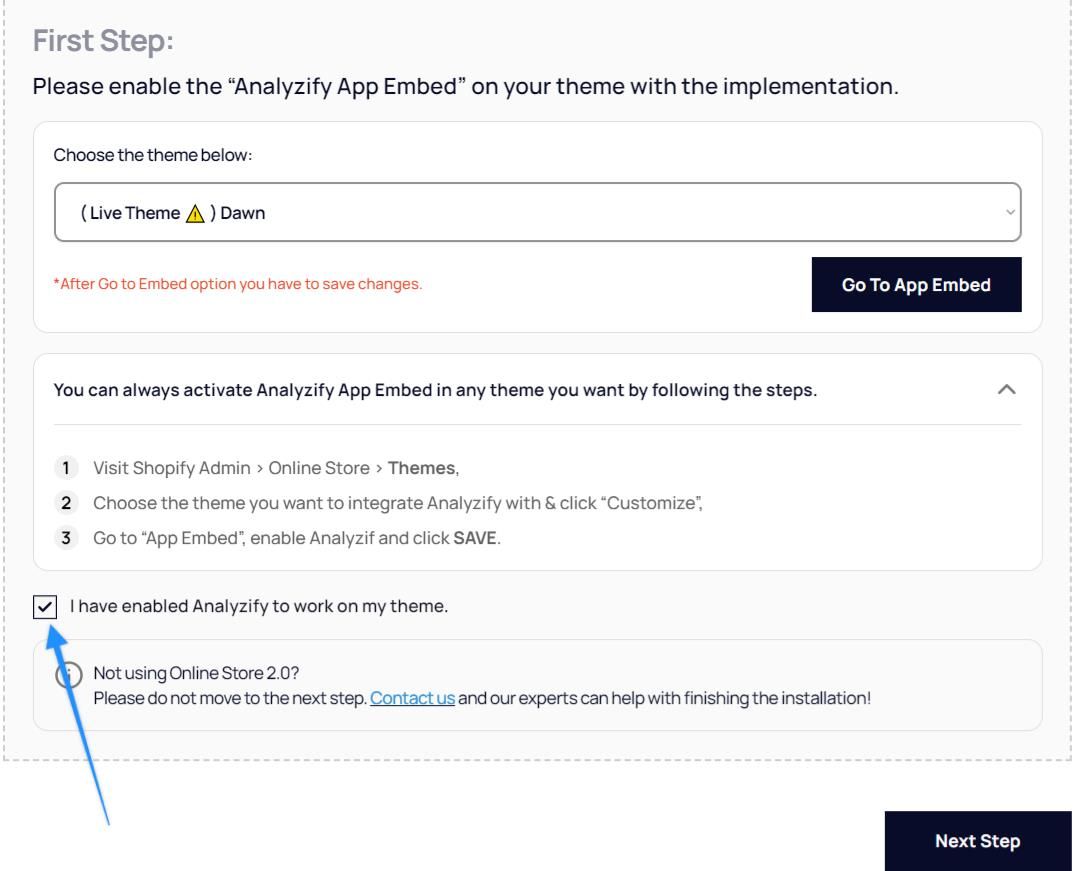
You can return to the app and check "I have enabled Analyzify to work on my theme." and proceed to the next step.
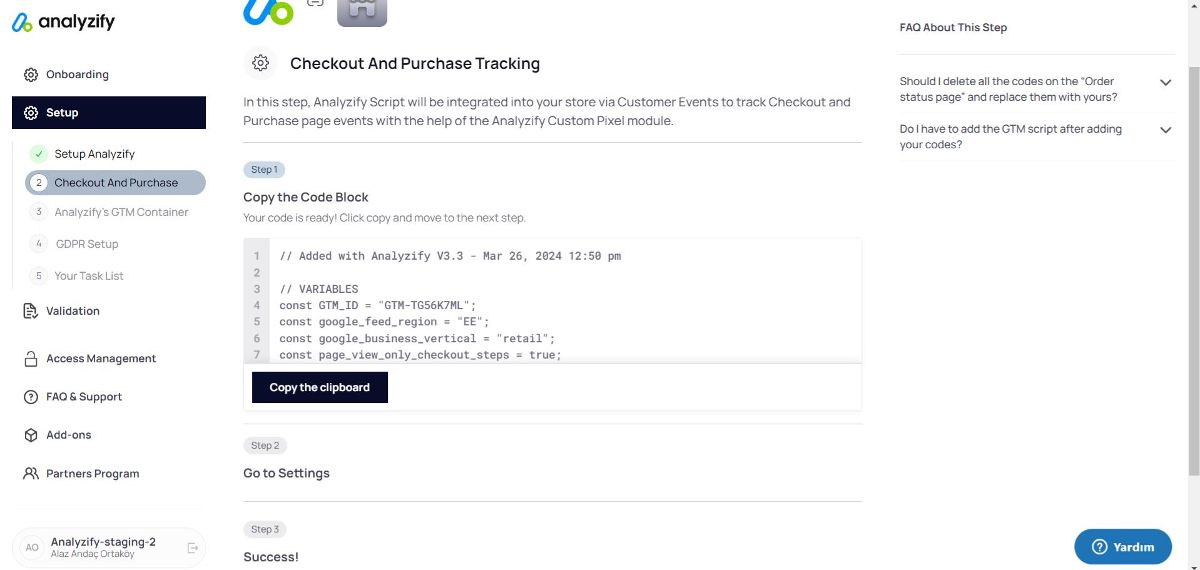
Checkout Tracking & Thank You Page Tracking
Here, you should integrate the code you copied into your store by creating a new Pixel in the Customer Events section within Shopify:
Please follow the steps below:
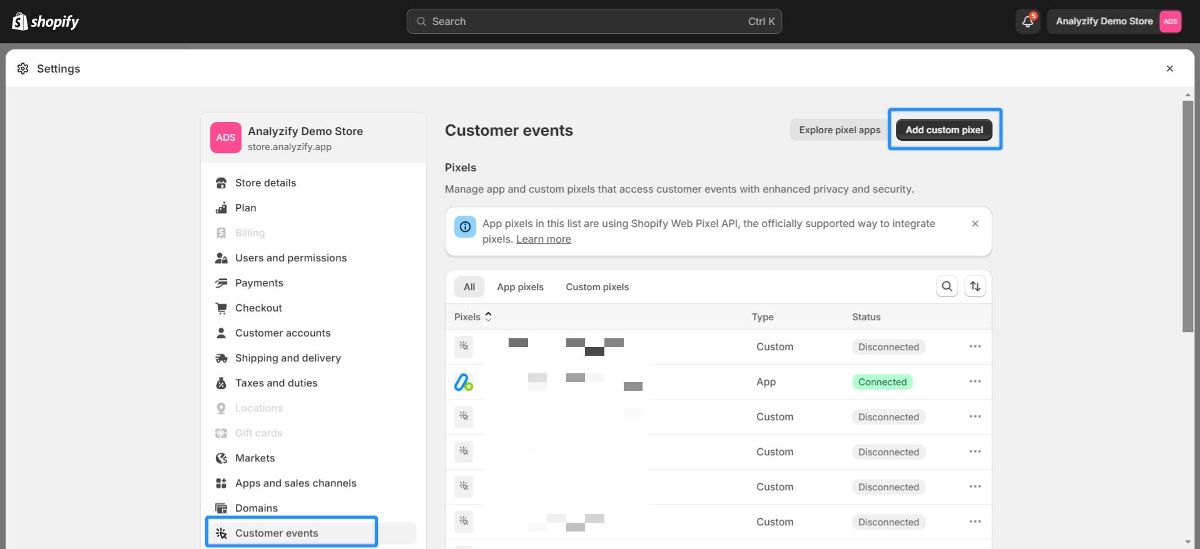
For this, first, click the Add Custom Pixel button from Shopify > Settings > Customer Events.
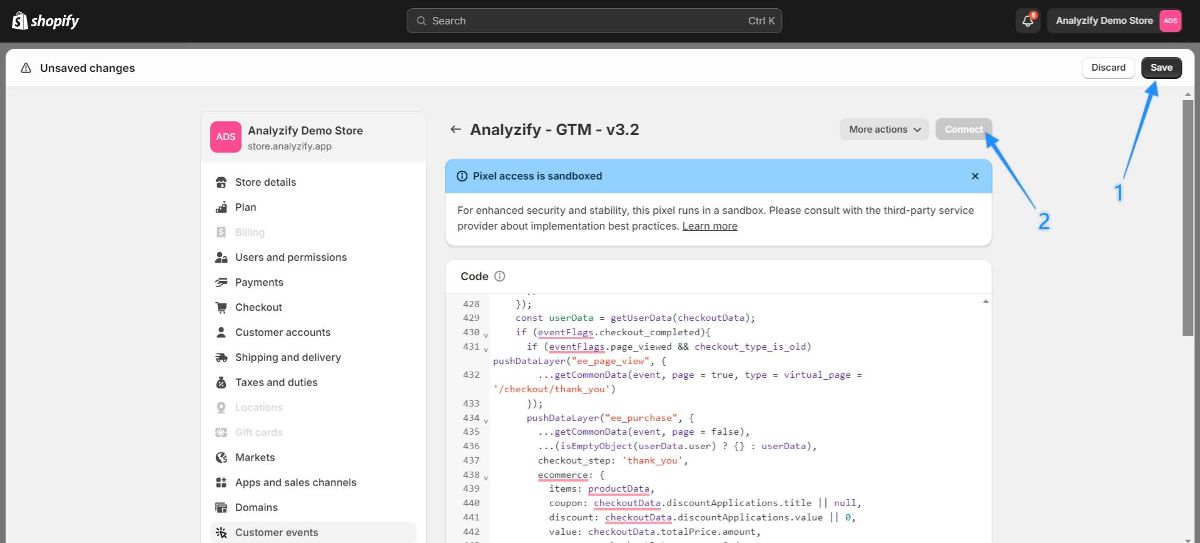
Name the Pixel something like Analyzify checkout module v3.2 and paste the copied code into the Pixel.
Click Save, then click Connect to activate the Pixel for the Checkout steps and the Purchase events.
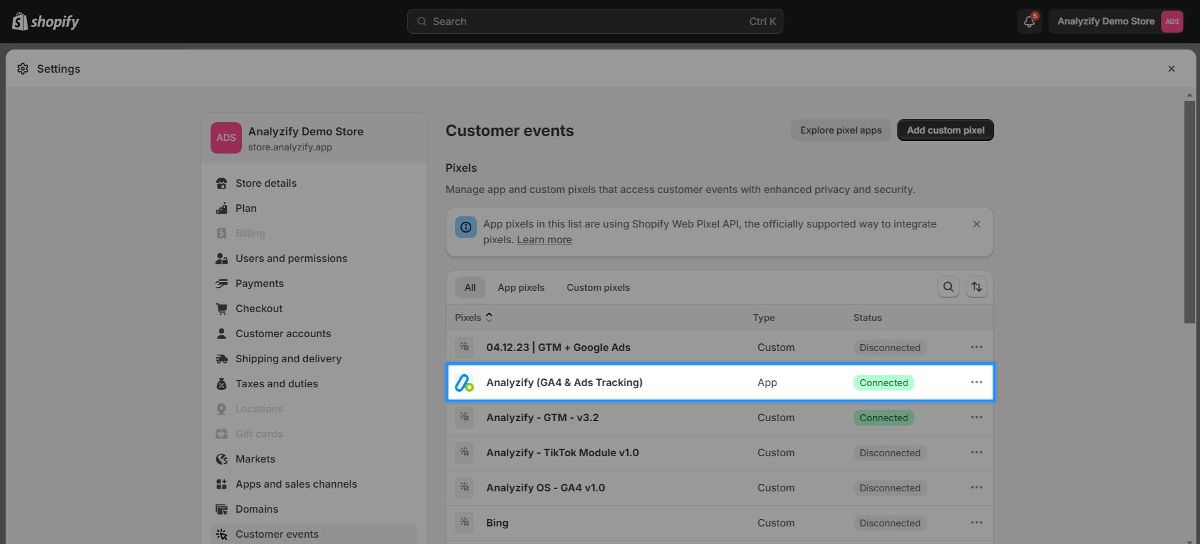
If there are any other Pixels related to Analyzify in the Customer Events List except for the Analyzify (GA4 & Ads Tracking) App Pixel, we recommend removing these Pixel integrations to avoid duplicate counting for Google Analytics 4 or other integrations.
Lastly, to prevent double the counting, you should also delete any code snippets related to Analyzify in the Settings > Checkout > Order status page > Additional scripts section. Remember that there might be other code snippets in this area, and it's advisable to transfer these codes to a code editor like VS Code before deleting only the part related to Analyzify to avoid any issues.
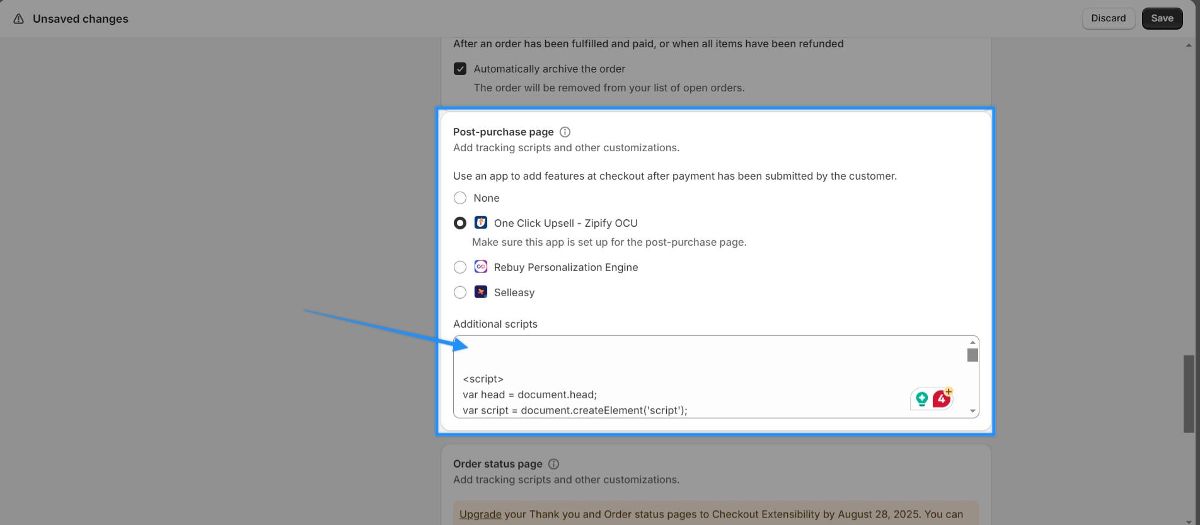
For customers using the Post Purchase App :
Check the Post-purchase page > Additional scripts area above the Order status page scripts for any ID(data transmission) related to your currently used Google Analytics 4 property.
If there is, please remove only the part related to Google Analytics 4 property as in the previous step:
Download GTM Container:
Up to this point, we have removed the old version of Analyzify from your theme file and activated the new version via App Embed, placed the necessary code for Checkout and Thank You Page Tracking, and removed the related codes in the sections to avoid any double counting issues.
Next, you will continue by updating the Tags inside Google Tag Manager .
As mentioned at the beginning of the document, the new version of Analyzify uses a new dataLayer structure . Therefore, when importing the file downloaded from the Admin Panel into Google Tag Manager, you will need to choose the Overwrite method .
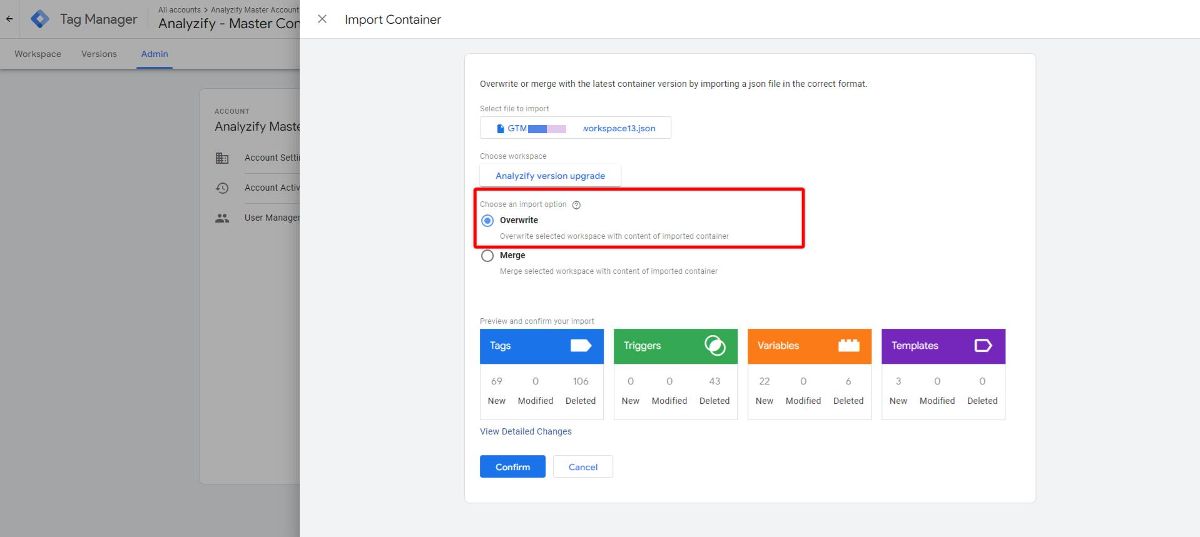
When you select the Overwrite method, we want to inform you that everything inside your current Google Tag Manager container will be deleted, and then only the tags from the Analyzify setup downloaded from the admin panel will be imported into GTM.
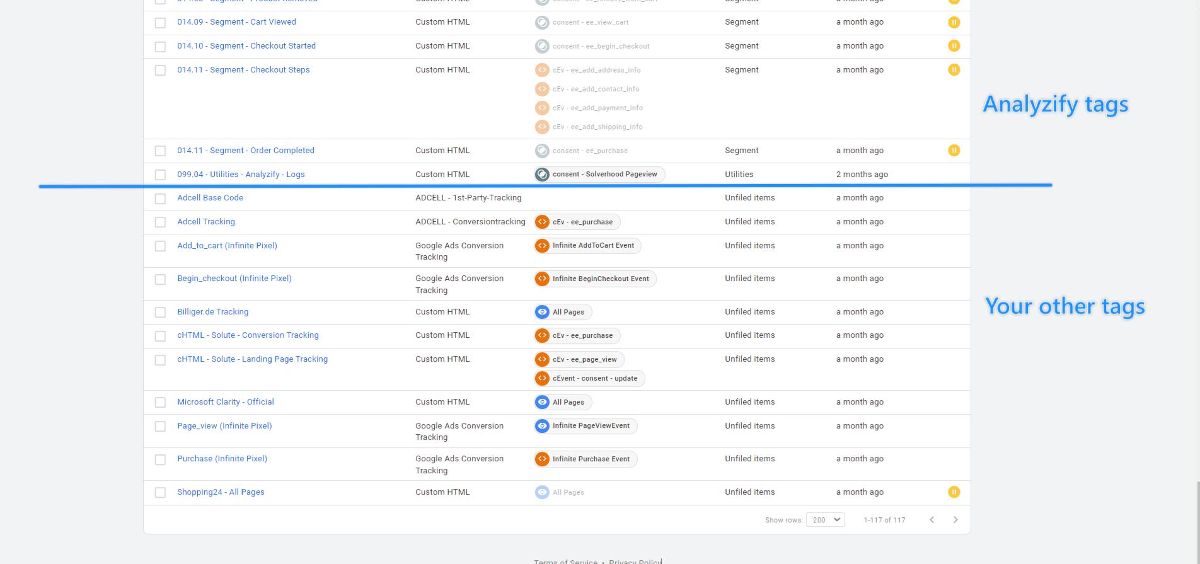
Therefore, if there are different tags in your GTM container besides the Analyzify setup, it is necessary to first export these tags from the GTM container and save them.
The easiest way to find the tags you are using besides Analyzify in your Container is to scroll to the end inside your Tags section because the Analyzify tags have numeric values at the beginning.
If you have saved a different tag with numeric values at the beginning, you should keep in mind that it may have mixed in between .
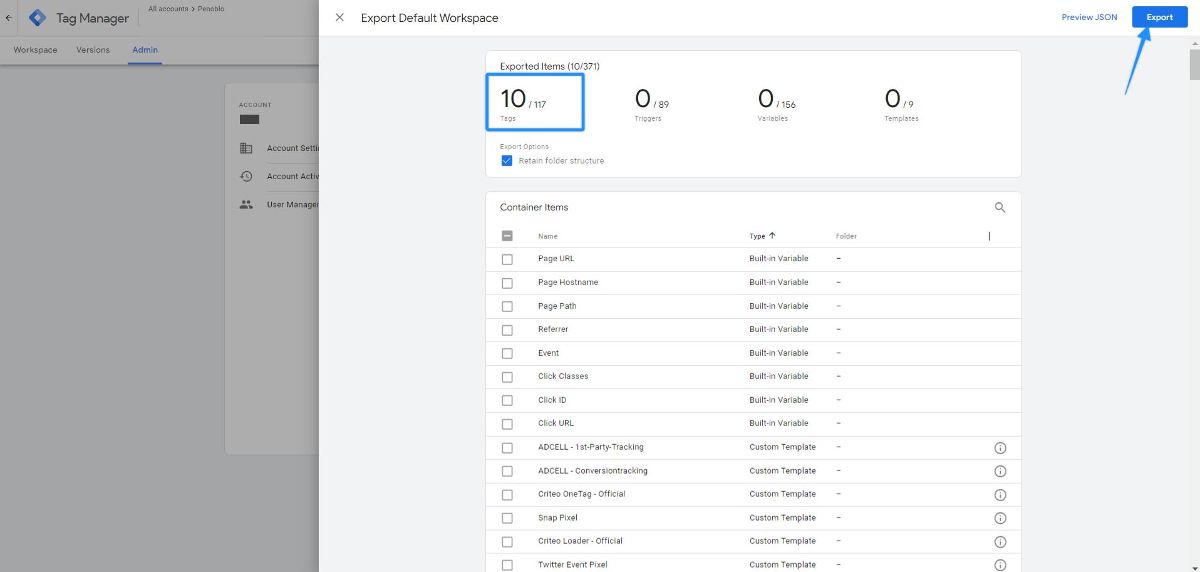
Here are the steps to export these tags:
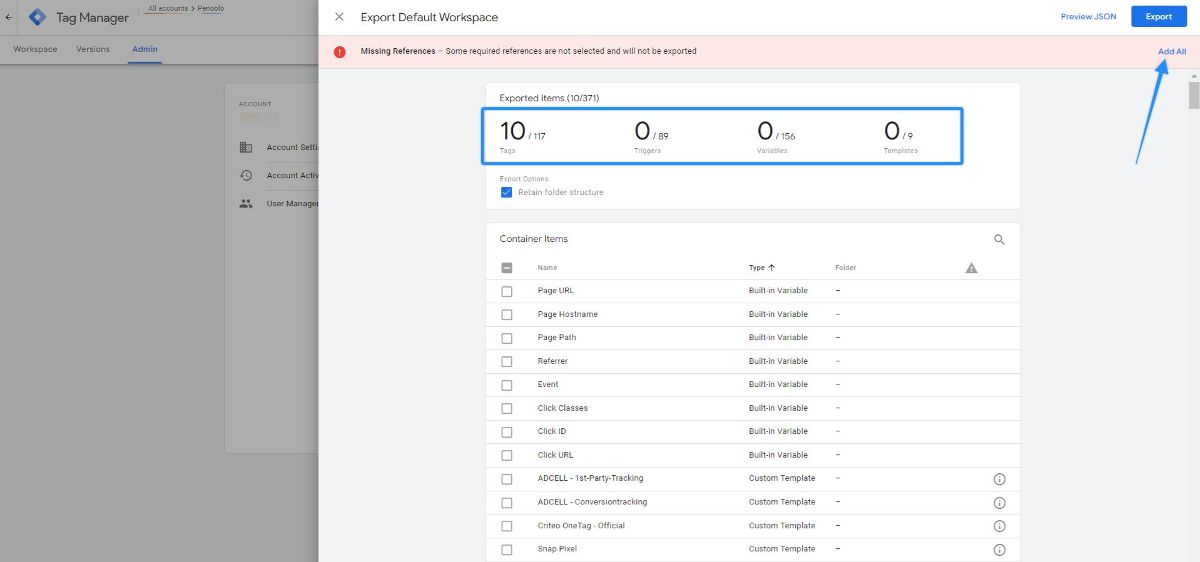
Select Admin > Export Container > Default Workspace

Find and select the relevant tags from the list one by one. Here, we want to inform you that only the Tags need to be selected; Variables, Triggers, and Templates will be automatically added in the next step. After all Additional Custom Tags are selected, click on Export
Click the Cancel button in the warning pop-up that appears
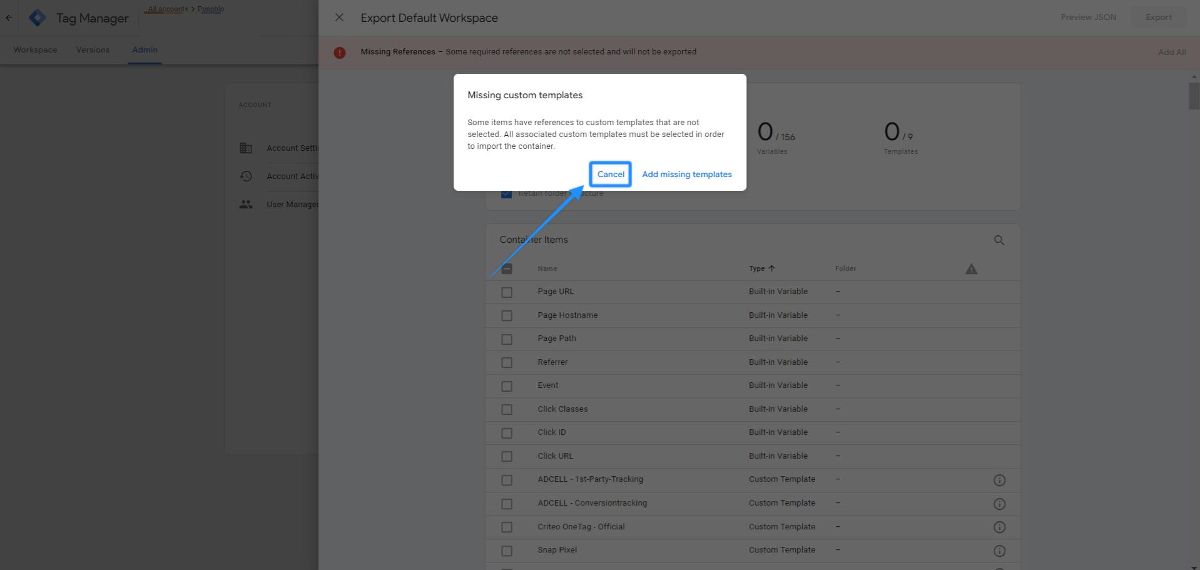
Then click the Add All button.
Add all Variables, Triggers, and Templates related to the selected Tags to the JSON file.
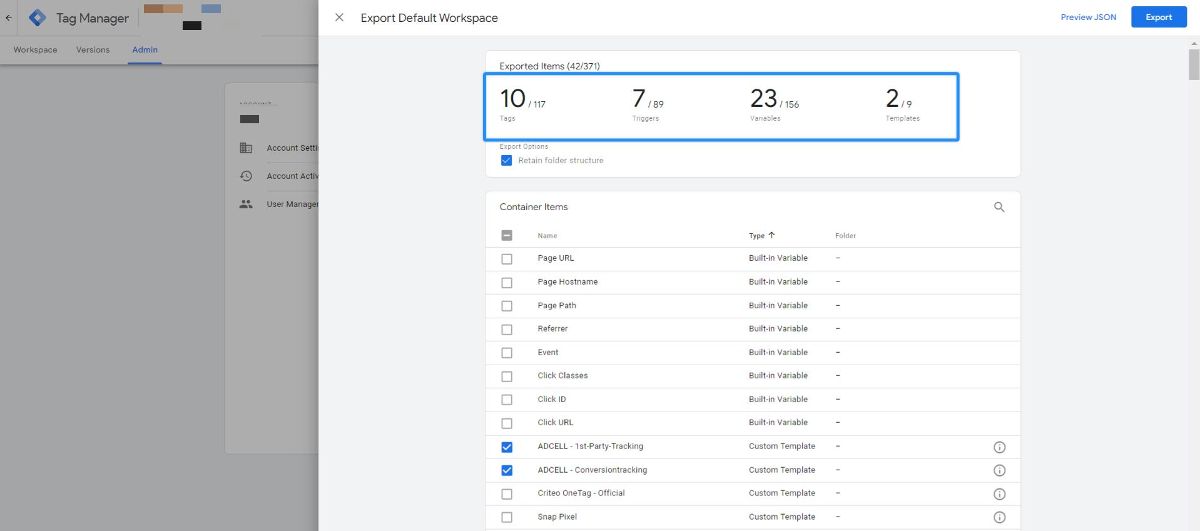
Click the Export button to save all Tags and their associated parts, other than the Analyzify setup, into a separate JSON file.
Now, firstly, you should import the JSON file downloaded from the Analyzify App into a different Workspace by creating it.
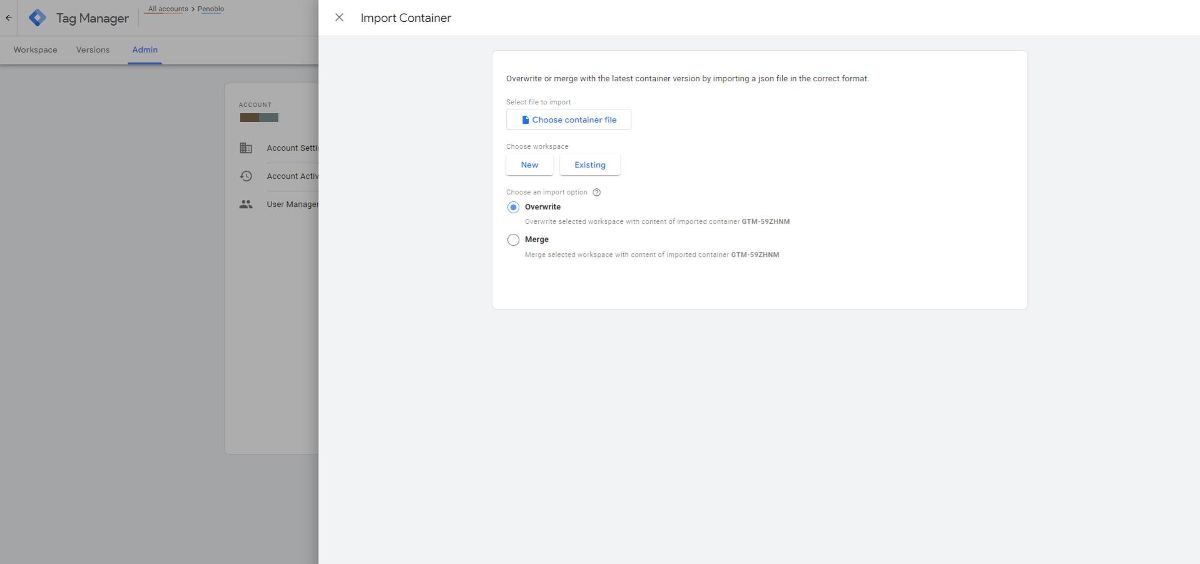
Choose your Container File: Select the Analyzify JSON file from your folder
Choose workspace: Select New and name it Analyzify v3.3
Choose an import option: Can stay as Overwrite.
Finally, as shown in the screenshot, click the Confirm button.
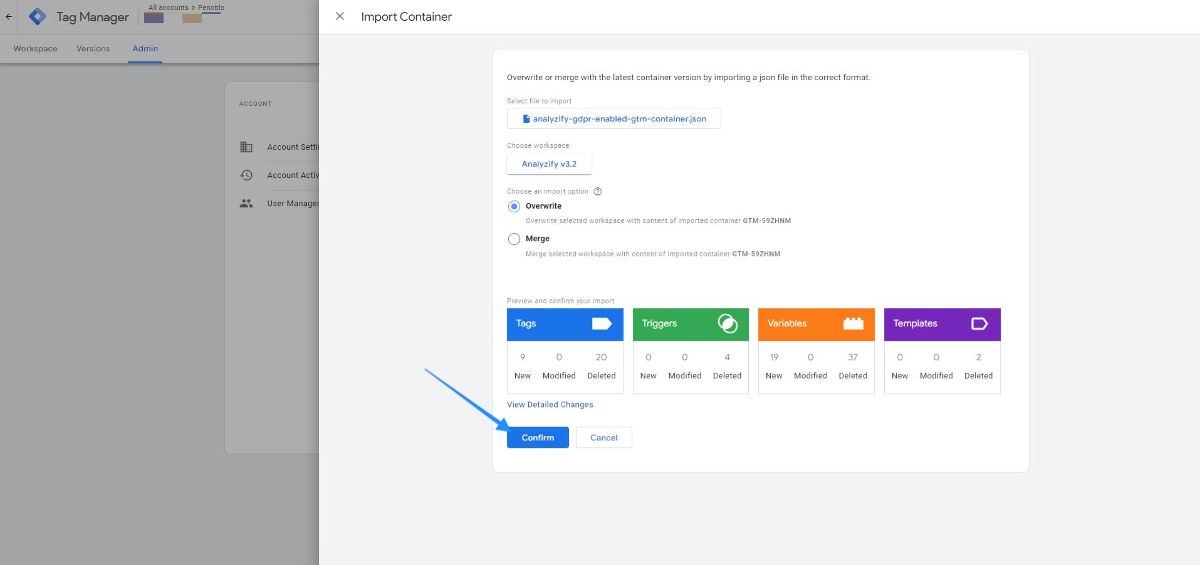
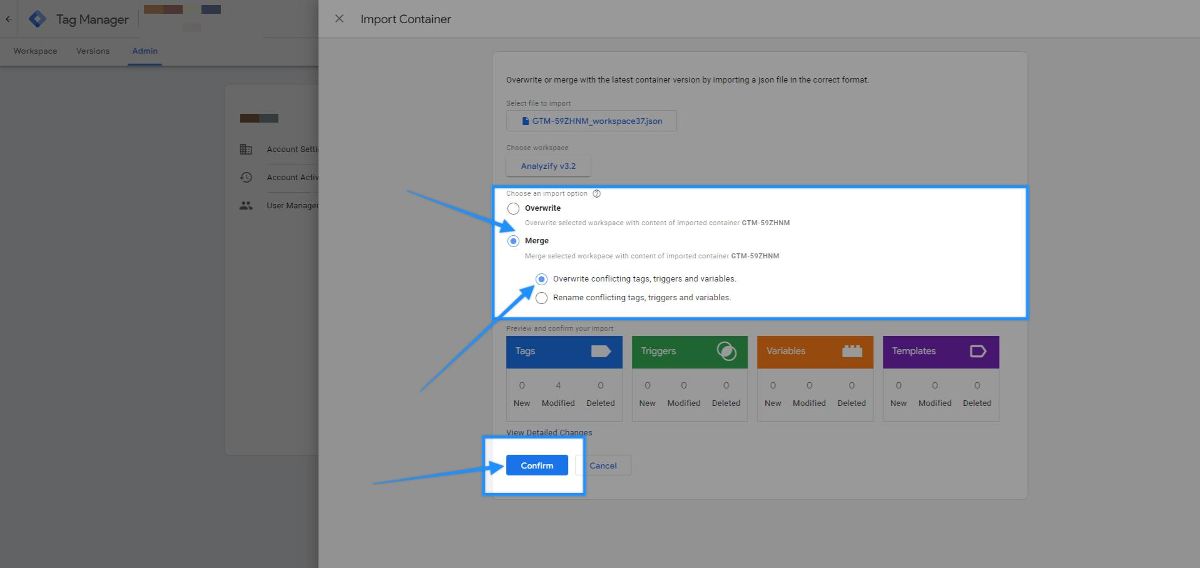
You will repeat the same process for the JSON file containing your Custom Tags, but this time you need to choose Merge instead of Overwrite so that the Analyzify tags you just imported are not deleted. You can click Confirm as shown in the screenshot.
Now, inside your GTM container, there is an unpublished container in a new Workspace containing both Analyzify v3.3 and other Custom Tags.
If any parameter used in the Custom Tags in the unpublished container uses a parameter from the old versions of Analyzify, you should replace these parameters with their equivalents in the new version.
You can find the new version's dataLayer variables in the Variables section.
After ensuring all Tags work as expected, you can Submit(Publish) the Analyzify v3.3 workspace inside the GTM container.
